Category: knitwear design

Amasei Shawl

In translation from Japanese Ama-sei 亜麻製 means “flaxen”.

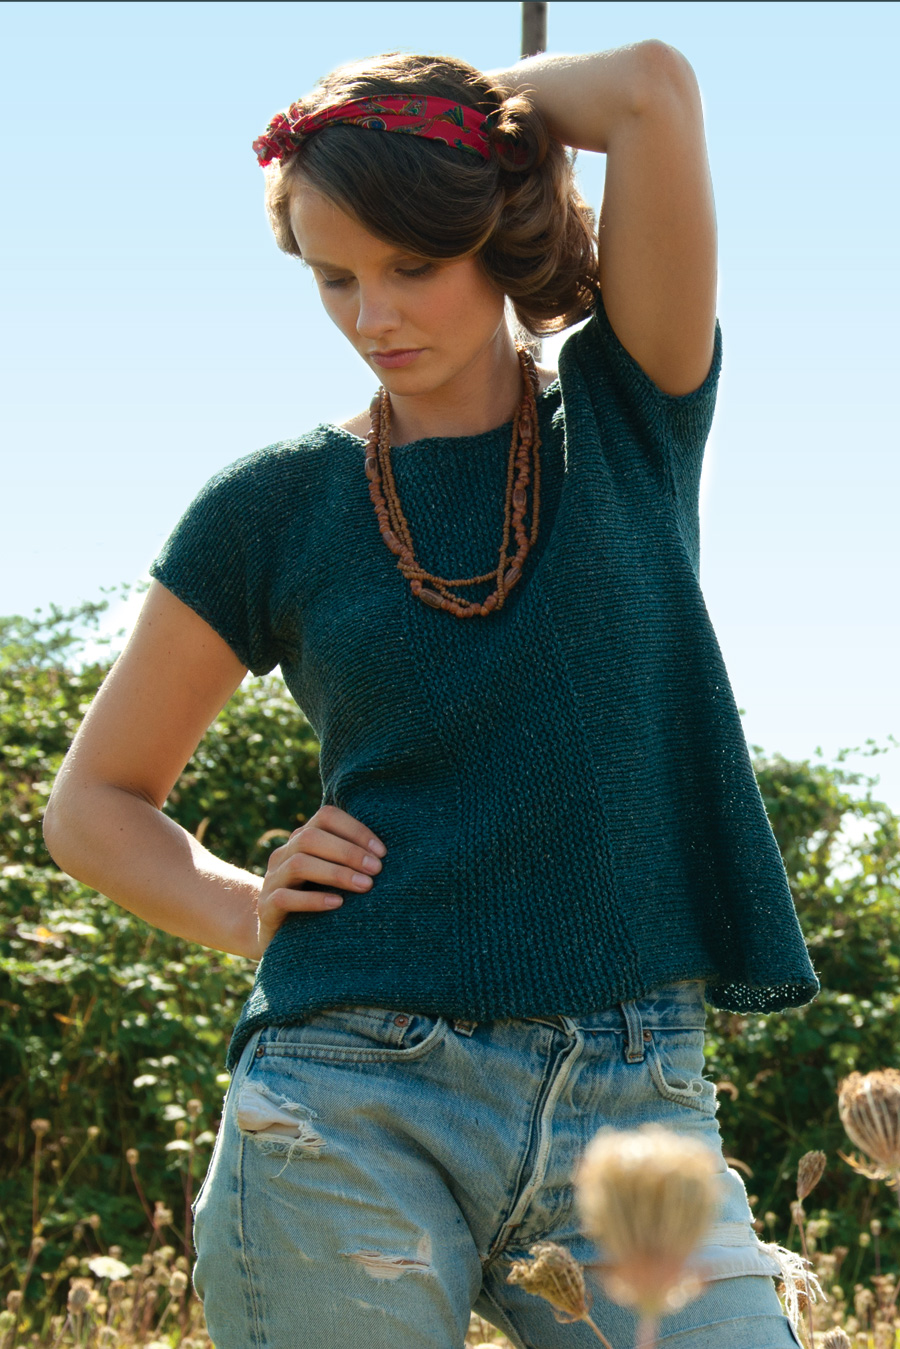
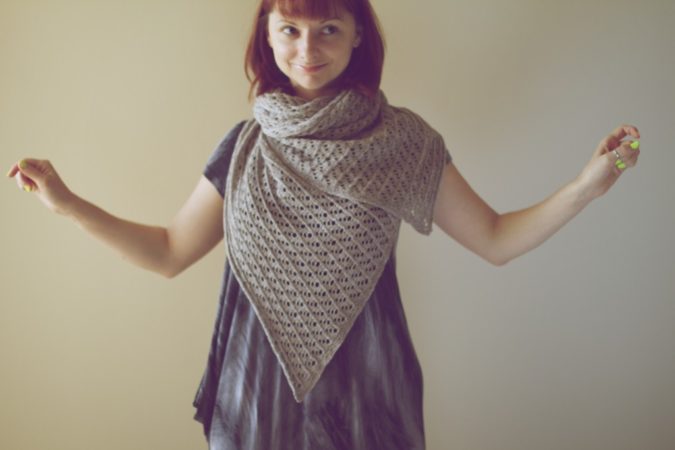
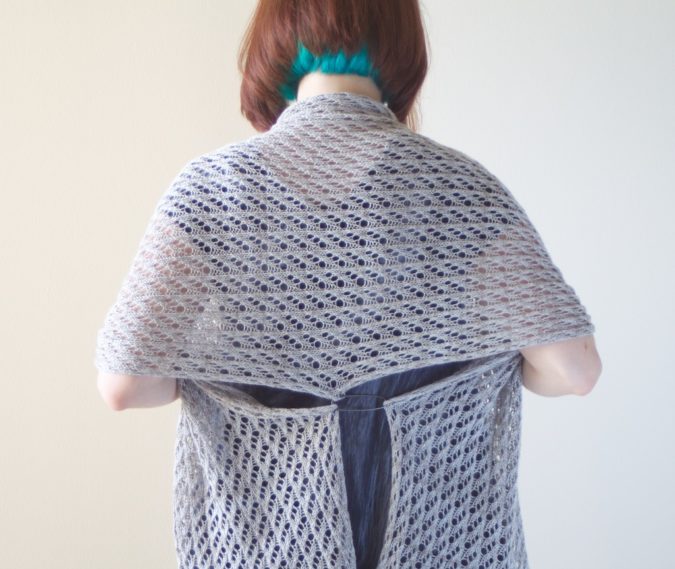
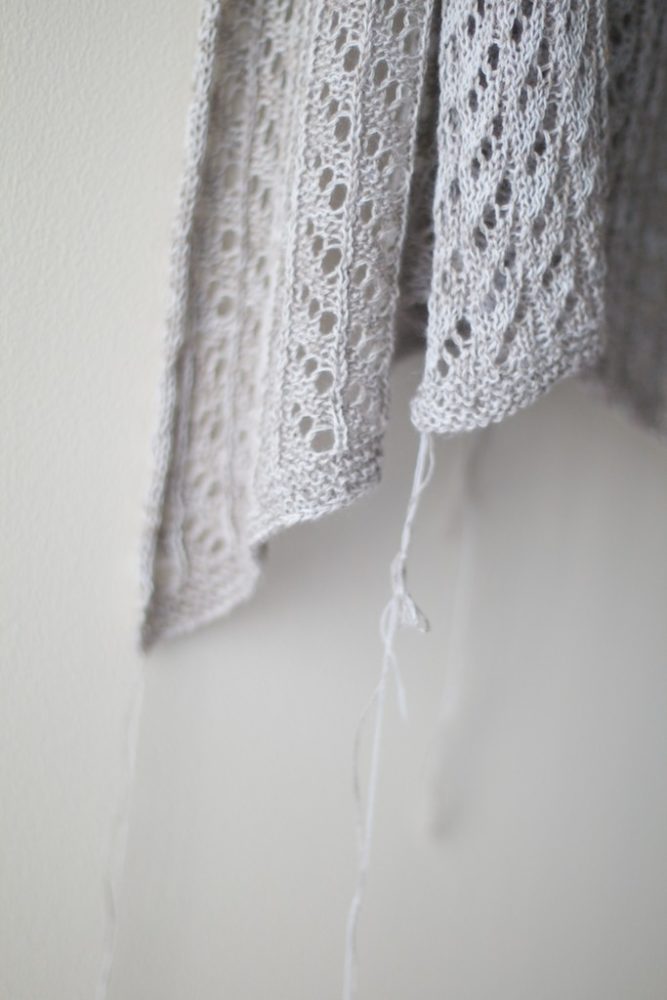
This fun rectangular shawl is a beginner knitting project for someone who wants to learn how to knit lace. The combination of fingering linen and cobweb merino yarns together create wonderful drapey accessory yet it’s cosy and comfortable. Perfect for chilly summer evenings as a wrap and it’s easy to bundle up in colder weather.
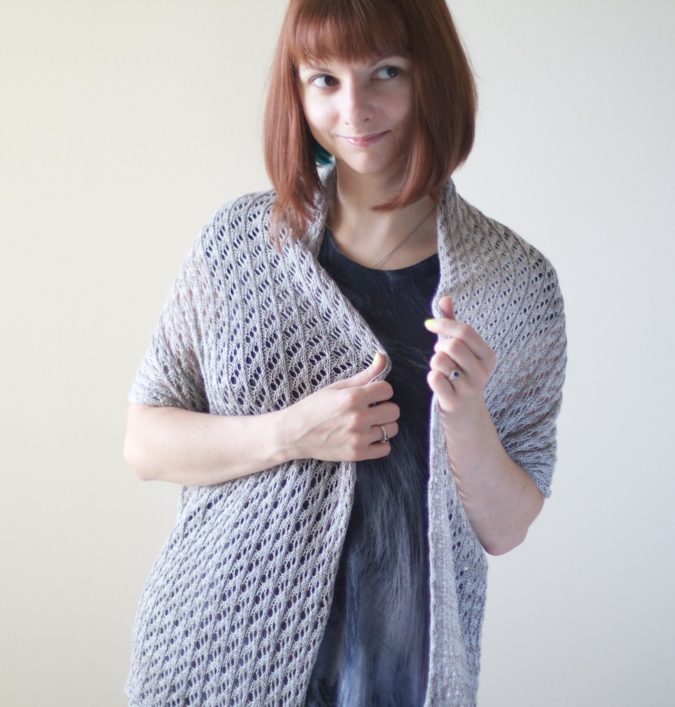
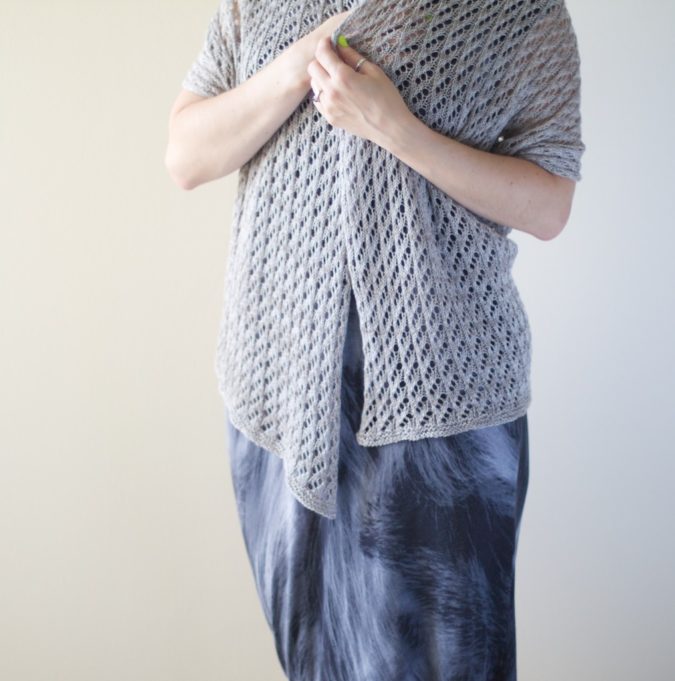
With a simple pin I got at Churchmouse yarns and teas this summer I turned this shawl into a cardigan.

And I love the slouchy look of this makeshift cardigan in the front.

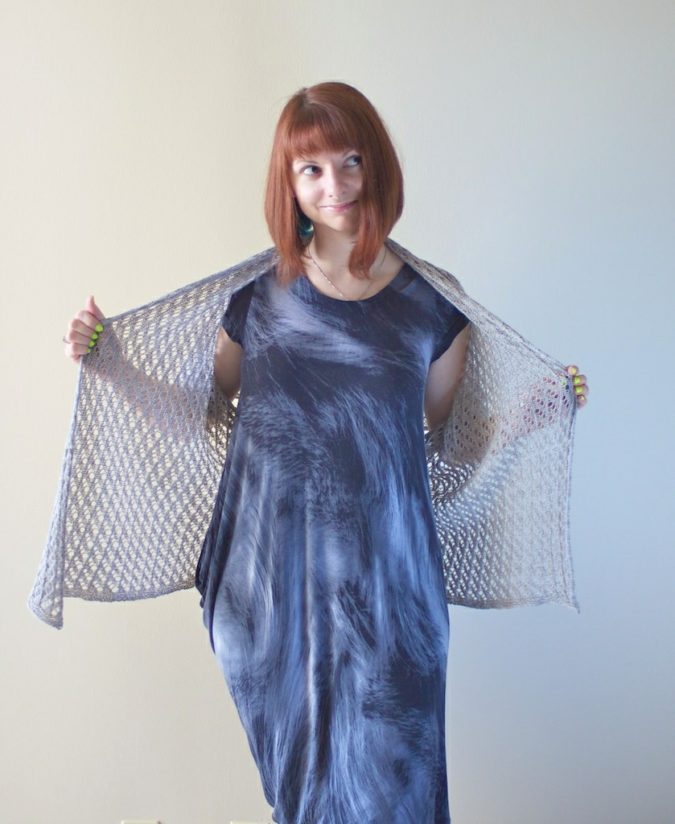
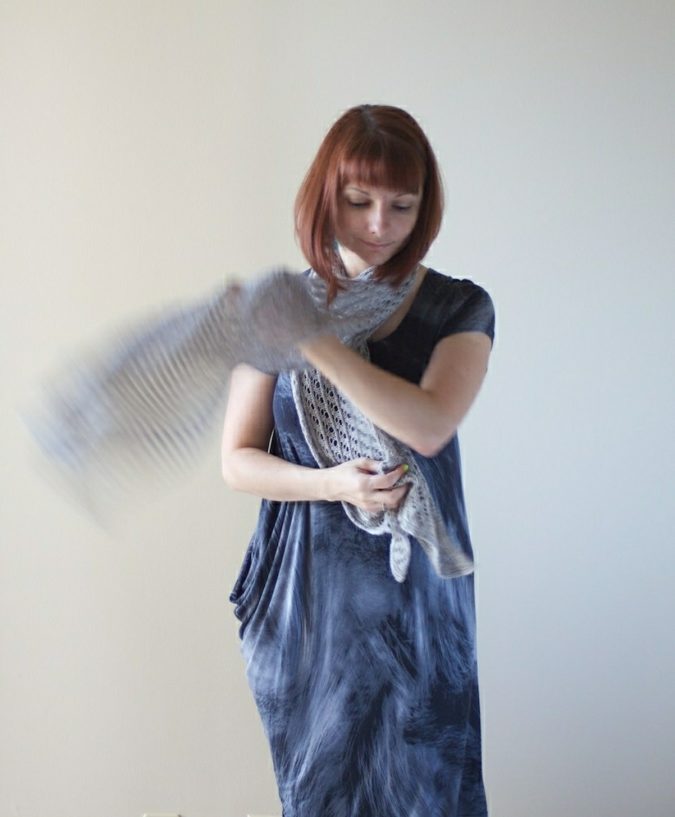
Or just more like a basic scarf scrunched up.

Please enjoy free pattern below, please do not copy and re-post text/chart of the pattern elsewhere. Just link to this post. Have questions? Just ask!

Queue on Ravelry

Skill Level
Beginner

Finished size
Approx. 70″ length and 23″ width (blocked)

Yarn
Yarn A:
Habu Textiles XS-21 Linen (100% linen), (763 yds/698 m per 100g/3.5 oz), 2 skeins
OR
Habu Textiles XS-55 Linen (100% linen), (370 yds/339 m per 48g/1.7 oz), 4 skeins

Yarn B:
Habu Textiles N-75 Fine Merino (100% wool), (747 yds/683 m per 28g/1oz), 2 skeins

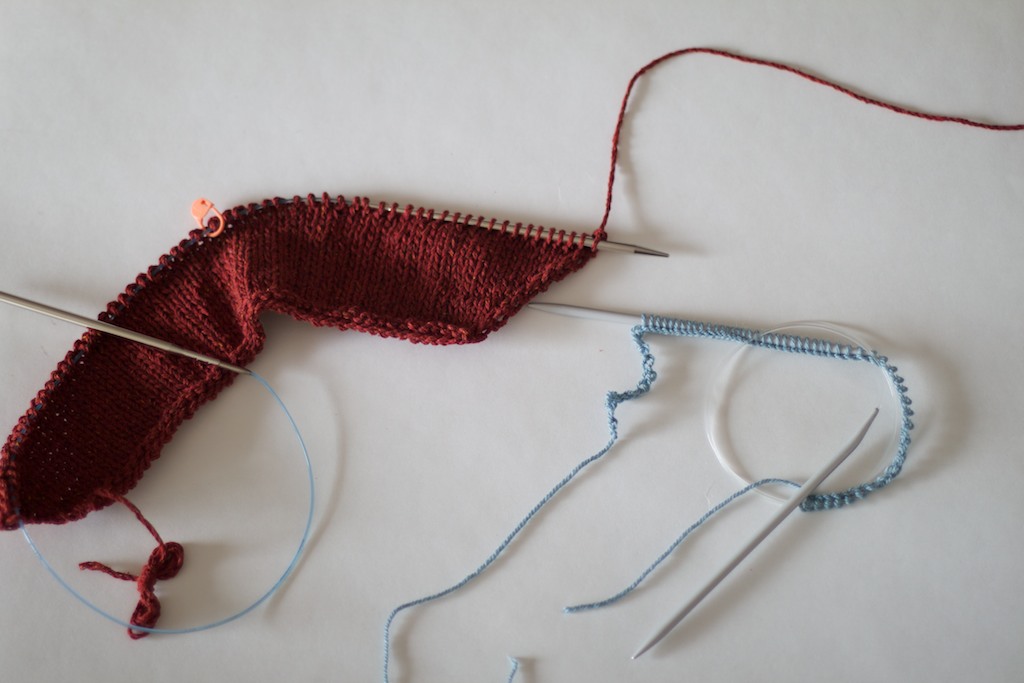
NOTE: Yarns A and B are worked together throughout in the sample shawl, but if desired you can omit Yarn B and work with a single strand of Yarn A only.

Needles
US 5 (3.75 mm)
OR use size needle to obtain gauge

Other
Markers (optional)
Tapestry needle

Gauge
20 stitches and 32 rows = 4″ in St st with 1 strand of A and 1 strand of B held together

Notes
To help keep track of lace pattern, separate each repeat by placing stitch markers at the * indicators in the pattern below.

Directions
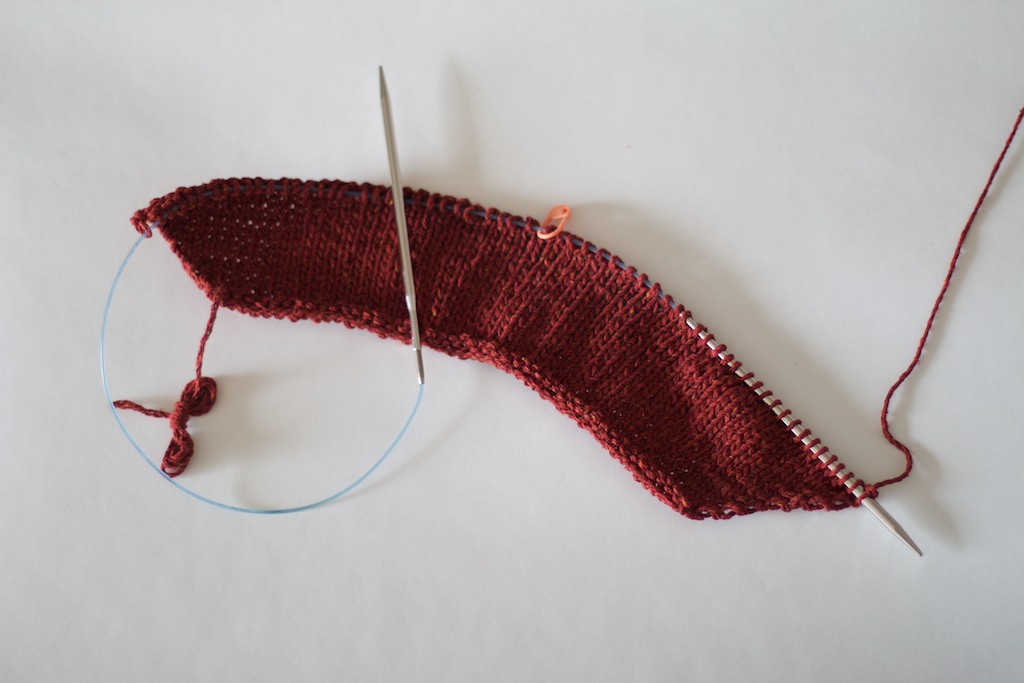
Holding both yarns together, cast on 118 stitches using the long-tail method.
Work 6 rows in Garter stitch (knit every row).

Row 1 (RS): K1, *p1, k2, ssk, yo; repeat from * to last 2 stitches, p1, k1.
Row 2: P1, k1, *p4, k1; repeat from * to last st, p1.
Row 3: K1, *p1, k1, ssk, yo, k1; repeat from * to last 2 stitches, p1, k1.
Row 4: Work same as row 2.
Row 5: K1, *p1, ssk, yo, k2*, repeat from * to last 2 stitches, p1, k1.
Row 6: Work same as row 2.

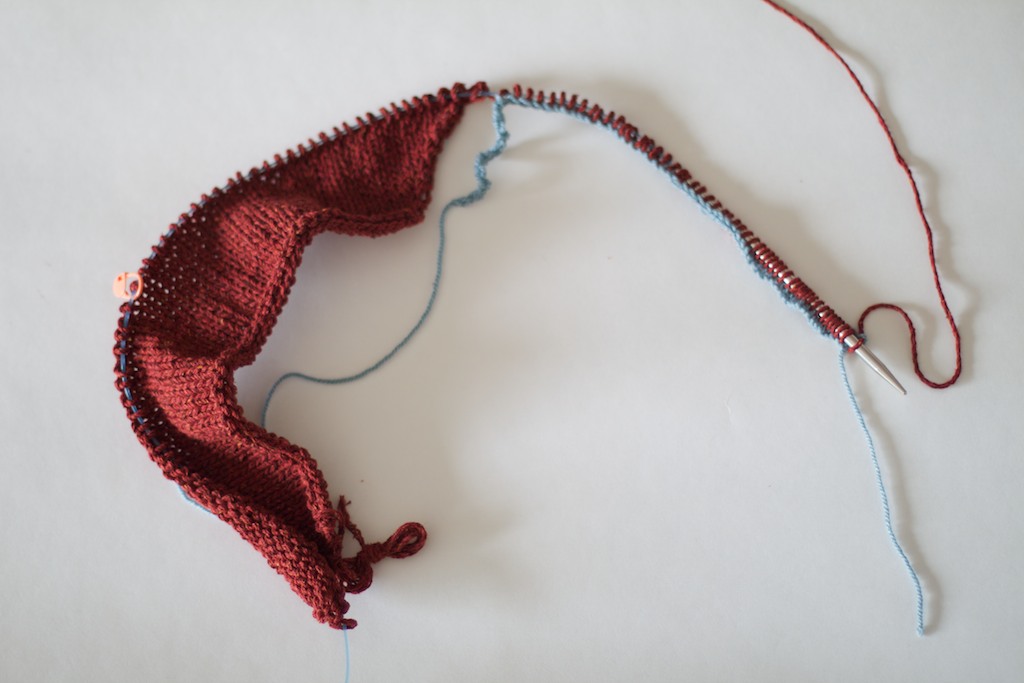
Work rows 1-6 for a total of 67 times or until shawl is desired length, keeping in mind that a larger shawl will require more yarn. Make sure to save enough yarn to work the final border rows.

Work 6 rows in Garter stitch. Bind off all stitches loosely on the next row.

Wash and block.


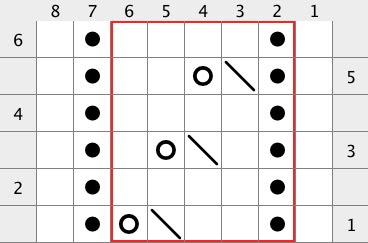
Red box represents a single pattern repeat.
K – Knit on RS, Purl on the WS.
P – Purl on the RS, Knit on the WS.
YO – Yarn over.
SSK – Slip, slip, knit those 2 slipped stitches together.

Sanagi giveaway winners!

This week really slipped through my fingers as I have spent majority of it swatching piles and piles…
But today I want to catch up and announce Sanagi Transformable dress winners!


Drumroll please…

Congratulations to sydneypaige, Olwyn Morinski and Illana H ! Each of them won a copy of  Sanagi dress pattern. Enjoy ladies and can’t wait to see you knit it up!

Olwyn Morinski is also a winner of Shibui Linen yarn to make this dress! Congratulations!!!!
Your wish to make and wear it in time for Christmas can now come true!!!

Sanagi Dress

While on the subject of linen, I have to mention about my discovery of a brand new linen yarn to the market by ShibuiKnits yarn company. Shibui Linen is a linen yarn with a chainette construction that comes in array of vibrant and lots of neutral colors and I was lucky enough to grab a bag of it for my new “transformer” knitwear design.
When trying to make the right yarn choice it contained all the necessary properties that linen usually does plus a range to work with – single or double or even triple stranded. This certainly opens up more options for one to experiment with this linen.

Today I am very excited to share my new design – Sanagi Dress.Originally inspired by a skirt I have designed for Ori Ami KnitsAirfoil skirt – Sanagi embodies bigger and more wearable garment with a range of styling looks.

When sides become swinging neckline.

Neckline becomes armhole, while sides create a decorative pleat in the front and the back.

Tied in the back, a la Apron Dress.

With I-cords tied on the inside, creating a more straight silhouette.

And many many more!..

When Sanagi design was being planned I started by wanting it be worn at least three different ways but upon my progress I have discovered that this idea is expandable by implementing several notions. There are at least 10 styling looks presented at the moment, but I am sure you can explore and find even more.

Constructed to be worked in the round, seamlessly, the fabric is completely reversible! You may want to have circular needles in 2 different lengths to make it easier for you to try it on as you go. And imagine instead of buying 1 pattern that will only look 1 certain way, here is one that yields at least 10 different ways. You don’t have to like every single one of them, but you can find several ones that suit your taste and body shape the best.

And to know how to wrap all those particular styles I have created a styling video where you can practice and learn all the Sanagi ways.

Pattern Specs:

LEVEL
Beginner
TO FIT BUST
30-32 (34-36, 38-40, 42-44, 46-48, 50-52, 54-56)”
FINISHED MEASUREMENTS
Around bust 68 (76, 84, 92, 100, 108, 116)”
YARN
ShibuiKnits Linen (100% linen; 246yds/225m; 1.76oz/50g):
7 (8, 9, 9, 10, 11, 12) skeins in Graphite #2002
OR 1576 (1772, 1970, 2166, 2364, 2560, 2758) yds of any other fingering weight yarn (to be worked held double)
OR 788 (886, 985, 1083, 1182, 1280, 1379) yds of any other worsted weight yarn (to be worked as single strand)
OTHER SUGGESTED YARNS
1 strand
Louet Euroflax Sport
2 strands
Habu Textiles A-1 Tsumugi Silk
Habu Textiles XS-55 Linen or Habu Textiles A-174 Cotton Gima
NEEDLES
US 7 (4.5 mm) circulars 29”, 47”, and 60”
US 7 (4.5 mm) dpns (for I-cord)
GAUGE
18 sts and 26 rnds in 4”/10cm over St st swatch worked in the round with yarn double stranded

Queue on Ravelry

USD 10.00

Giveaway Alert!!!
Fun times ahead!
Lucky 3 commenters would receive a copy of Sanagi dress pattern pdf.
But only 1 of the lucky three will ALSO get Shibui Linen yarn  enough to make Sanagi dress in their size!!!

How to enter this giveaway:
Leave a comment for this post below by midnight on Saturday EST, August 25th, 2012.
AND
Like Olgajazzy page on Facebook or Follow olgajazzydesign on Twitter
Winners will be drawn on Sunday, August 26th!
ETA: Please include your Rav ID or email to contact you.

GOOD LUCK AND HAPPY KNITTING!

Aranami


The story for this design started 2 years ago. Believe it or not it is how long at times ideas have to sit inside a sketch book before they finally materialize. After Petal Halter design success I thought about working out a similar looking shape and incorporating it into a different type of a garment. And this design’s story is not particularly cheerful at the beginning. The design was turned down twice when I submitted it to be published elsewhere, but it lacked a secret ingredient which I have finally found last January…


Making the right yarn choice transformed the idea into a perfect marriage or you can call it some other epithet. But the yarn and colors made this shawl “sing”.
Actual patterning that takes place within the shawl can remind everyone of sometimes they know. Whether grey storm clouds, fish scales, even ceramic mosaic floor tiles and of course – as in a place where I live – of a traditional Seikai-ha print or sewn pattern of sashiko embroidery, fabric and prints.
To me personally the shawl reminded of winter ocean of Japan, stormy weather, foamy raging waves, greyness and obscurity of the horizon line between the sky and the water. That is why this shawl is named

Aranami 荒波 (jap).- (n) stormy seas, raging waves.

After I made a swatch I did all necessary calculations to start on actual shawl sample and I LITERALLY couldn’t put it down.. It’s quite addictive really, portable and you just keep telling yourself – one more, 15 minutes later – one more.. then you start seeing color transition to aligning beautifully. I will admit I burned midnight oil while knitting on it couple of times but no regrets. Just wanting to finish the last color and tier… and take it all in!


I am going to be making a couple more of these. I want to explore more color families! Aranami is exciting to work on – being not overly complicated, relaxing garter stitch so you keep attention on shaping, yet it’s a pleasure to know that the shawl is reversible! My only suggestion would be, when picking up stitching instead of going between the last and the previous stitch as you would usually do, go inside the last stitch itself. That way the lines on the wrong side would be less bulky, they would be still outlined delicately.


I know I am in love and if you are not yet, be prepared to! Brooklyn Tweed LOFT has an amazing range of 32 heather shades. I used 5 colors, 1 skein of each color. So 5 skeins! But amazing yardage of LOFT actually will yield 2 shawls out of those 5 skeins. They will just have to be made in 2 different graduating color directions. Still it’s great usage of yarn and yardage! Remember there are several flagship stores in US that carry Brooklyn Tweed yarns at their locations.

Choosing colors together is a bit harder for some, so I have put together several LOFT color pairings to help. You can also order Brooklyn Tweed Shade Card and play with it for the colors you prefer.

My original Aranami was done in


Fossil, Snowbound, Sweatshirt, Soot, Cast Iron

And you can easily replace Fossil with Hayloft or Embers to create a sort of grellow or effect of sun setting/rising over grey seas or skies.. just an idea.


First column: Fossil, Woodsmoke, Barn Owl, Nest, Pumpernickel
Second column: Snowbound, Sweatshirt, Faded Quilt, Almanac, Old World
Third column: Faded Quilt, Stormcloud, Truffle Hunt, Meteorite, Pumpernickel


First Column: Embers, Wool Socks, Long Johns, Homemade Jam, Plume
Second Column: Postcard, Blanket Fort, Thistle, Plume, Old World


First Column: Hayloft, Sap, Fauna, Tent, Birdbook
Second Column: Sap, Tent, Birdbook, Artifact, Cast Iron
Third Column: Foothills, Tent, Birdbook, Artifact, Cast Iron

But you certainly don’t have to stick to these colors combos above, use your imagination to entertain other ombré pairings you can create with these colors.

Pattern specifications:
Level – Beginner Intermediate

Finished shawl measurements (blocked)
Depth 14”
Wingspan 67”

Yarn
Brooklyn Tweed Loft (100% US Targhee-Columbia Wool; 275yds/50g): 1 skein each of “Fossil” (A), “Snowbound” (B), “Sweatshirt” (C), “Soot” (D), “Cast Iron” (E).
OR
any other fingering weight wool in colors
A: 6g or 33yds
B: 14g or 77yds
C: 22g or 121yds
D: 30g or 165yds
E: 38g or 209yds

Needle
US 2 (2.75mm), circular 36″ or longer

On Ravelry

USD 7.00

HAPPY KNITTING!!!


Shadow

Speaking of last year’s Shadow.


photography ©BrooklynTweed

I am WAY behind, so I am catching up. Today I want to tell a little bit more about an exciting collaboration I was lucky to be a part of last year. I felt so very honored to be among many great knitwear designers and talents in BrooklynTweed | Wool People Vol.1.
I am sure everyone knows Jared Flood, a fellow knitwear designer, amazing photographer and a genius mastermind behind BrooklynTweed. Who not so long ago has started his own yarn company with his namesake and a desire to bring all American grown soft wool to the knitting world. As a result, wool from Targhee and Columbia sheepies that live and graze in Wyoming, US is blended, then spun in historical Harrisville mill in New Hampshire into wonderful squishy skeins of Shelter and Loft. And now many of us are eager to get our hands on these exuberant heathers that both yarns come at. This yarn is not sold in every yarn store, but only several flagship stores or directly online and it’s worth every little yard and penny.

At first, when I have swatched a variety of stitch patterns using Shelter I was amazed how great it looks with cables. They are delicious and fluffy and texture just pops. And at that moment it has become obvious that I have to create something cable-y since it had been way too long from my last cabled project! I honestly have hard time finding adjectives to describe my experience on working with this woolen spun yarn. I don’t think in my knitting life I have worked with it ever before. You have to try it for yourself – this yarn is sticky so it’s great for colorwork, yet it bounces, it feels a bit like sponge when you knit with it, yet soft and malleable, really like a marshmallow! And once it’s washed it blooms a great deal. Garments produced barely weigh anything versus when you knit a sweater in worsted spun. I have re-discovered what it’s like to have a cabled knit sweater that weighs only 300 grams?!! That’s why I gave my Shadow a lot of love and wear this winter.

But back to the origins of it. As my path was set onto cable-town, I wanted to preserve a bit of my personality in this design. So with little geometric cable texture, flattering fit and a whimsy to keep it modern yet balanced. The swatch below is not knit in Shelter though. And my doodle called a sketch, but you get the idea.

I have used telescope lattice stitch as a starting point. That stitch has always reminded me of the famous French luggage company Goyard Monogram logo, but I wanted to customize it and make it more distinct. Those cables had to have more “breathing room” to stand out and not look crowded. And in the pullover itself,  idea of having cables right under your arms and sides can get a little bulky, so I have chosen to go with a reverse stockinette stitch to ease that part up. And little pockets are given as an option, you can knit them, you can skip them entirely, but they felt organic that can make this sweater “young” without tipping the overall texture and cables balance. Stand up neckline shaped into a collar and is backed with a knit facing worked in the same yarn, but provides the necessary structure for it.


After I have worked through the design and have sent off the sweater, there was this new X-men movie out in the theaters and my eyes kept staring at the wallpaper in one of the scenes. This was interior of a submarine believe it or not, but I couldn’t move my eyes away from the Goyard-looking wallpaper. It just looked so good and after having worked through my own design process, this print had me excited all over again.

I had to do a little bit of research to find out that this wallpaper is being made and in several colors by Osborne & Little and this print is called Trifid. Neat, isn’t it?

And here are couple more detailed images of Shadow on a grey Japanese January afternoon a year ago.

There has been many great variations of Shadow since the pattern has been published last August. Make sure to check them out and queue your own on Ravelry. You know you absolutely need one!

View colors of Shelter yarn
Shadow Pullover on BrooklynTweed site

Shibui Silk Winners

Congratulations to Amy, Tina and Robyn who each won a skein of Shibui Staccato and Shibui Silk booklet!!! I hope you all love it and can’t wait to cast on for those designs!

It’s still pretty cold here in Japan, even got “lucky” to be stuck in blizzard on the road in mountains near Nagano last week. (Don’t worry I had a knit project to entertain me on the road while bus driver was meandering through multiple tunnels and curvy roads). Beautiful landscapes are treacherous nonetheless. There has been lots of deadline knitting going on here, so lots of tea drinking and wearing of woolens to keep warm. Let’s speak of woolens next time. I have been having lots and LOTS of fun with them in the past year…

Decyphering Francis

Since Shibui Silk has been out for 2 months now and nothing makes me happier than eager knitters itching to put those projects on their needles. There have been lots of questions and inquiries about Francis and today I am going with a little step by step tutorial with photos what makes this tee so innovative – construction.

Francis is worked horizontally and in 2 parts. Beginning with the sleeve and working towards the middle of the front, while both backs are worked using short-row shaping, then overlapping. Yet there are no side seams, no shoulder seams. I know for a fact many knitters do not like seaming knits. I truly believe there are times when seams are a must simply for preserving the structure of your knit garment and you have to account for likely fiber behavior in your yarn after washing and wearing. But at times when I see there is a chance of making seams invisible – I am all for it.

In case of Francis, although body is worked straight along the sides, the opening on the back is very flexible, that helps the Tee to acquire that slightly flared silhouette. And in case if there were side seams, they would naturally be riding up the front and be quite noticeable. Being a detail oriented perfectionist I didn’t want those visible details and Heichi is strong enough yarn to support this tee’s structure, so I have figured out how to make it go away.

1.


Starting with the sleeve and working your increases all the way till shaping is complete, ending with WS.

2.


Next step would be casting on stitches with scrap yarn provisionally on a spare needle.

3.


With yarn still attached to your sleeve, purl across freshly cast on stitches.

4.


Now working on RS knitting across all of your stitches on the needle to the other end of your sleeve.

5.


This step is a little bit fussy. But you unravel scrap yarn from provisional cast on and place those stitches on spare needle.

6.


And this is the part that probably caused most confusion. Fold your sleeve slightly in half to bring your work needle to underarm/armpit to meet the beginning of your spare needle. Knit across those stitches on spare needle.

7.


In this step many have found it hard to work just with one long circular needle, so you can split your stitches between working and spare circulars. But what is happening here – you work from front hem up towards the shoulder, across your shoulder/sleeve, down towards the back hem. As one of knitters correctly compared it – you are working a “big upside down U”. And as you progress, you will find more fabric growing and working needle being sufficient in length to accommodate your knitting.

Use your tail to seam the sleeve seam and use excess of it to close up that underarm hole if necessary.


So ultimately, that invisible seam can also be worked in another way. If you are familiar with Eastern or Figure 8 cast-on methods, you can wrap yarn around both ends of spare needle and work it that way too, only from my personal experience I have encountered those methods to be a bit loose after first row and in need of tugging out/adjusting, while Provisional method I used avoids such problem.


View Francis projects on Ravelry knitters are working on or already completed

Francis in images above is being made in Brick and I can’t wait to finish it. Weather is warming up in Japan so it works as a great season transitional garment, to layer or as is. Heichi comes in array of trendy colors and lots of neutrals as well.

FRANCIS SINGLE PATTERN PDF
8.00

NB!
Couple days ago there has also been some errata discovered and I have updated Ravelry design page for Francis, but I am posting existing errata below as well.

Errata for the printed booklet ONLY:

For Left and Right Back Neck Shaping:
77 (80, 82, 85, 87, 90, 92) sts rem.
Work 31 (33, 37, 41, 43, 45, 49) rows even. Piece should measure approx. 5.25 (5.5, 6.25, 6.75, 7.25, 7.5, 8.25)” from last neck dec.

Bind off for the right back:
Next row (RS): Work to end, picking up and purling wraps tog with wrapped sts as you go. BO all sts kwise on the WS.

SHIBUI SILK

Now when I think back to 2010 it all feels months and many knits away, but it was at that time when the seeds for this book sprouted. Having worked with Shibui Knits folks before I knew the experience will be great from beginning to finished result. And after seeing wonderful new (at that time) yarn Heichi, working with which was the new adventure I wanted to embark on. Here IT IS all shiny and new – Shibui Silk!

Shibui Silk booklet published January 1 this year is a work of more than just one wonderful yarn, I was lucky enough to work with 3 (!!!) silk-containing ShibuiKnits yarns. What can top that? Silk here, there and sometimes double dose of silk in a single project. Contrast between yarns’ individualities and textures is great, but main idea behind ShibuiKnits concept is to juxtapose different materials that would create “beauty with a touch of bitterness”. A true Japanese feel and approach. It’s by keeping this philosophy in mind I tried to create through combining and transforming Staccato, Heichi and Silk Cloud into knitwear. And not to forget amazing creative crew at ShibuiKnits Darcy, Kristin, Jenny and eagle-eyed Alexandra who turned this booklet into what you see today!

Last year’s summer was a very hot one in Japan and for us, knitwear designers, it’s the busiest production time to get all new and exciting things ready for cooler season. One would think that silk on it’s own is more of a gentle and summer-like fiber, but don’t be mistaken, with its wonderful properties of softness, drape and flowing fabric silk keeps plenty warm. In several garments and accessories I have paired the yarn together with Silk Cloud to give them more delight to increase its wearability during freezing months, besides give magnificent squishy comfort that reminds you of wooly winter knits.

Arnett
Arnett is more than just a long coat, it’s one of my favorite transformable garments that I have created. Tricks of this coat are numerous: it’s convertible, reversible and transformable!
The construction of Arnett is practically seamless – just one on the neckline and several faux seams along the sides and raglan lines to express structure. Both fronts are actually doubled width and thanks for nature of the fabric and its positioning, these “extra” fronts turn into various shapes for collar or transform into modular and functional pockets. Turn it inside out, overlap the fronts and belt it and no winter chill would get to you since it’s made in Heichi and Silk Cloud. If I were to call it “coat-I-live-in” I would, but Arnett sounds prettier.

Francis
Innovatively constructed tee with a surprise in the back. Worked horizontally it’s full of techniques to learn, but still quick to make in tweedy looking Heichi. One may find it a challenge, but follow instructions as you knit step by step and you will find that enlightening moment when you learn something new! (But tutorial is to coming though). Worn on its own but easily layered it can even be worn backwards. Opening in the back actually helps the silhouette to flare out although there is no shaping on the sides.

Laverne
Now that is another convertible piece. Jacket with long fronts actually has button front closure and hidden drawstring goes all the way around top neckline. Toss one front over your shoulder for cosier look, button it for a dramatic looped front or pull the drawstring to create gentle pleats all around the jacket. Almost mindless but lustrous and amazingly drapey knit is created using Staccato.

Ada
Fun vest or a tee worked in Heichi with uneven hem and a Silk Cloud longer hem in the front. It features an usual continuous shoulder construction and square neckline. I have chosen to make expressed faux seams even though majority of it is worked in the round. Rustic look of Heichi silk and lush of Silk cloud are a perfect example of texture juxtaposition.

Goltry
Believe it or not, but this hat is completely reversible with 2 differently looking textures on each side. Stitch pattern used is very stretchy that can accommodate large hair or give more slouch as it’s worked in silky Staccato which provides visible shine and drape. Worked in the round it requires minimum of finishing.

Tulsa
Well-thought out use of pleating stitch creates texture and dimension in this scarf. Knit in Staccato for great drape but pleats are providing more structure and creating ruffling effect within the fabric itself. Make it wider for more of a shawl effect or longer if you desire more ruffles adorning your neck and shoulders.

Marlow
This shawl will be easily favorite during winter months as combination of yarns used create tactile perfection. Staccato has great stitch definition and radiates through the nimbus of Silk Cloud and are worked in gradated welts pattern to transform it into a scrumptious shawl.

Prue
Fingerless gloves are never enough in my household whether on a bike ride or to pull over your leather gloves for extra warmth during blistering weather outside and many other occasions. Worked in same yarn combination as Marlow with textured welts pattern it can make a quick gift or treat of luxury for yourself. It will feel like putting on balm by cuddling your hands up in these luscious mitts.

Now… fun times!!!

To say thank you to my readers and fearless knitters I am giving away 3 Shibui Silk Booklets and 1 silky skein each of ShibuiKnits Staccato in color Chrome (seen in Prue and Marlow).

Please leave a comment below (1 comment per person please) about which design you find as your favorite from Shibui Silk booklet with your contact information (email or Ravelry ID) by March 12th, 2012 midnight PST. Thank you everyone!!! Entries for giveaway drawing have been received and are no longer accepted. 3 winners of Shibui Silk Booklet and a skein of Shibui Staccato will be announced March 15, 2012.

Like Olgajazzy on Facebook

Three lucky winners will be randomly chosen from the commenters below.
Good luck to everyone and Happy Knitting!!!

Winners

I hope all have been well and ushered the New Year of 2012 happily and properly insulated with your favorite knits. New Year here started very eventful in every sense – from a shake up earthquake on January 1st (we are well!) to exciting releases of collections and designs. I am excited to talk about them and stick to my resolution of being a better blogger.

But first I need to attend to important piece of business, the 3 winners of BSA patterns giveaway are:

Michelle
KT
Nerdy Knitter

CONGRATULATIONS!!! Each of you is getting a set of my 3 new patterns published by Blue Sky Alpacas. And thank you everyone for participating, there are more giveaways planned this year, so don’t despair, keep knitting and I will make sure you have more patterns to knit from.
Meanwhile, aforementioned ladies if you could please contact me via email listed on my blog with your address information.

So to start with one thing at a time, while we are talking about Blue Sky Alpacas, the new catalog of theirs has been released in the first week of January, that included my new design with a little of a namesake, called Jazzy Cardigan. In reality it’s more of a cardicoat. Made in scrumptious, air light, yet very warm Techno.

The choice of this cable pattern was not accidental, my love for anything geometric and this cable conveys the balance between organic flow of a cable yet with rather geometric shapes mixed in between.

Although looking complex, cable-making becomes intuitive throughout the process when you tend to “read” your fabric below your needles. The flowing cable bands seem to “prompt” you on the next step. The cardigan is worked in pieces, but with button bands incorporated with the fronts. Seams give enough structure and stability to the loft of the yarn while cables reflect the 3D texture of the coat. I have chosen to go with “afterthought” pockets, since they can be done as an option, but personally are very comfy to hide your hands in when it’s chilly outside and you don’t have your gloves/mitts. I am really keen on modern styling that BSA have chosen for this cardigan, but I can also see it styled with a pencil skirt for a more dressy look.

On Ravelry

On Blue Sky Alpacas

Happy Knitting!