A new pattern for a scarf, very simple, but I have gotten some requests for row and stripe count, so here is a pattern for those interested. Enjoy!

A new pattern for a scarf, very simple, but I have gotten some requests for row and stripe count, so here is a pattern for those interested. Enjoy!
It has been months since I showed off my Habu explorations, as it seems to be the only projects/yarn/concept I am being drawn to in between my deadline projects..
I am… I have accumulated 3 finished Habu garments.. shame on me, heee.. well. I just didn’t have time.. I wrote a huge post… clumsy me, hit something on the keyboard and it was gone.. sometimes this happens, but at that moment I was almost done, so pulling my hair out or just yelling some words to my non-russian speaking cat.. didn’t fix it.
So here that goes..


This skirt became a success because I had a great buddy in face of Julianne (Ravelry link), who was making this skirt at the same time (she is actually making also a habu mohaired skirt as well!), so we got connected and figured it out together, we had to email Takako once. As usual she was very helpful and it was all cleared out. Printed english pattern had some typos, but it felt good about putting some idle brain cells to work. J apanese patterns are all about math afterall. I will be posting some tutorial-like on the corrections and modifications I did to this design on Habu KAL shortly.
I have eliminated seaming, by doing provisional cast on and grafting it to the end of the fabric after and did a casing with elastic instead of drawstring, just by knitting extra fabric and turning it into a hem.
And eliminated doing 2 parts of the yoke, by just picking up and knitting garter stitch in a round, but still doing the decreases along the sides indicated by strategically placed markers. The least favorite part- it took about 2 hours and tons of patience just to weave in those zillion of ends, but in the end I saw how it improved the sturdiness of the bottom edge.
The skirt before blocking looked like an elongate mini.. and original is shown in your mid-calf, I am not a model height, so just below the knee was the right length and I wasn’t blocking it to the original measurements. But, seriously, if you are taller and need longer skirt, it will block out , plus it is silk and in a skirt gravitation power would still pull it down.
The next was a secret gift.. which I can reveal today, Happy Birthday, Vanessa! It is my Birthday gift for her!
It is linen paper A-60 from Habu again, in two colors used for A Chinese Style Pullover aka kit-89. I have used the pattern from my book and US 9 needle, though next time I make it I may try it on recommended US 10 (6mm).
I love how airy and noisy this project was and is as a garment. Kirsten of assemblage fame pointed it out, this is a musical garment at some point.. so who needs a fireplace with crackling firelogs? Just get one of those and you kill two birds at the same time!
I hope V enjoys wearing it! It is perfect for steamy summers, as you get style and breeze constantly!

 Thank you kindly all kind commenters and for vising my blog here, I Love to hear the response and what you think and I strongly approve your feedback. This hat reminds me so much of Gwen Stefanie’s casual days in tabloids (I promised my husband not even look into the direction of that kind of press), when she is hiding behind her big sunglasses and a slouchy hat shielding her blond locks.
For some particular reasons I can’t produce a full sized pattern for it, here I give you the instructions on what I used for mine. Please refer them as general guidelines and adjust them accordingly to your needs, size, gauge and way of knitting. Things surely will turn out differently as any of us, our knitting is unique and tension can be thicker, thinner, but remember if you need to make it looser, go up a size on the needles. Unleash a designer in each of you, crafty knitters!
Yarn: Blue Sky Alpaca’s Sportweight
1 skein of 501, 504, 521
I suggest not to use more than 3 colors.
US 8 (5mm) circular 24″ and US 8 (5mm) double pointed needles (I suggest wood ones if you are using some very smooth yarn to prevent slippage).
To fit 22″ head circumference.
Using Long tail method cast on 68 (72 sts for a bigger head/bulkier hair) sts with darker yarn.
Join in a round, carefully not to twist and place a marker in indicate the round beginning.
Start the twisted ribbing pattern, which is :
all rounds: *k1tbl, p1* repeat throughout the round.
Work 10-13 rounds and then switch to contrasting yarn.
Increase round:
*k1, k1fb* repeat to the last 2 sts, k1fb , k1fb.
102+1(108+1)
Next round start the linen stitch pattern:
Round 1-2: * k1, sl1wyf* continue throughout the round.
Round 3-4: *sl1wyf, k1* continue throughout the round.
Continue knitting in the same manner just switching yarns when you desire, on the stitch marker point and I suggest not to cut your yarn, just leave it and use it when you decide to switch colors, it eliminates extra finishing.
Knit till hat measures 8′ from the increase round.(beginning of the linen stitch).
Decrease part. Switch to the darker color (one used in a headband ribbing), work 2-4 rounds.
Divide your stitches: *17 (18) sts and place a marker*, last section will have 18 (19) stitches.
Decrease round:
*slip marker, ssk, work to the 2 sts before the next stitch marker, k2tog*, continues throughout the round.
Work 2-3 rounds in linen stitch, repeat the decrease round, repeat till you get very little stitches left, in the midst of it you may want to switch to double pointed needles to ease your work. Then cut off your yarn leaving about 6-10″ tail, thread
it into a darning needle, run it through remaining stitches and securely tighten it. Pull the yarn on the inside and weave in all the ends. Washing and blocking is suggested to let the stiches align beautifully and you can place it on something round to block, but laying it flat will work just fine.
Any questions? Feel free to email me, I would be glad to help!
08/15/2007
ETA: I have corrected some mistakes, make sure to review, thanks!
Thank you everyone on your warmest comments and wishes on my finished projects! It has seemingly warmed up here, and mid 80ies trying to get you to the outside events, knitting 100% wool on the balcony in the sun afterall may not be such a good idea =)
Here is relatively new section of my blogging experience: tutorials and know-hows.
Most of us know the idea of a knit-on border. When there is a piece of knit fabric that you create as you go whether it’s lace or cable you work it and attach every row onto your garment. In this case you will always slip the last stitch of your RS row and pick up a stitch (or knit a stitch if the stitches are live) from the border of the garment and pass the slipped stitch over. Turn work and on the WS slip your first stitch and continue the row.
Note: Gauge of the border and the garment may vary, so make sure how your tension works for you: you may want to go down or up one size of the needle.
To make is easier with the numbers, I made a chart and a legend to make it easy:
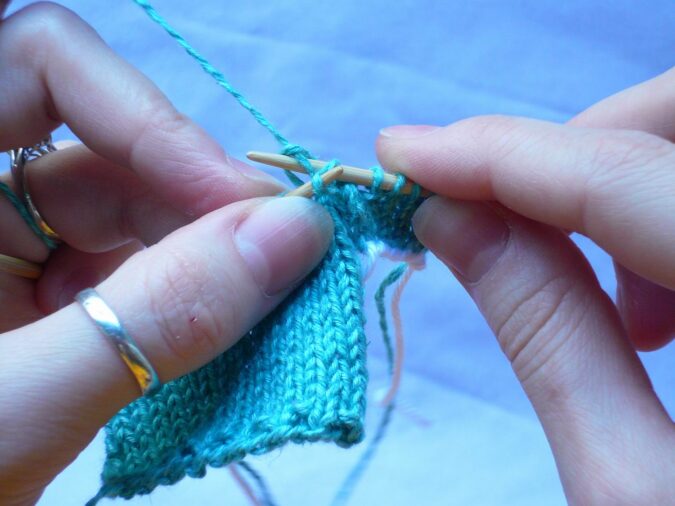
Using scrap yarn and provisional cast on method with a hook cast on 7 sts. Next RS row already start knitting with main yarn the 1st row of the pattern above.
1 . Work your row to the last stitch.
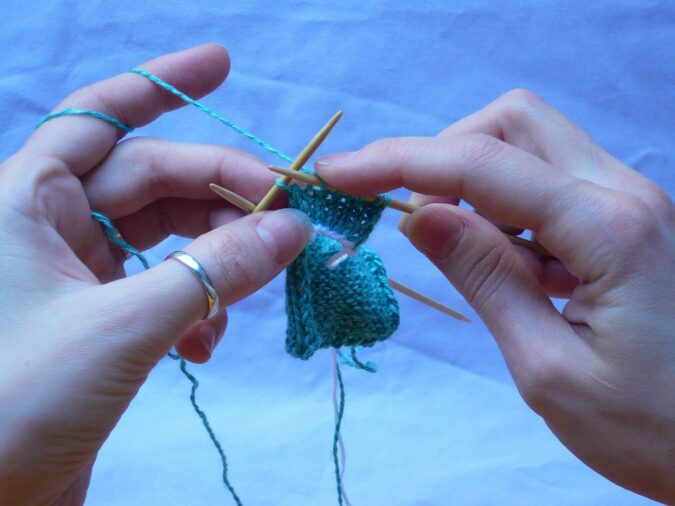
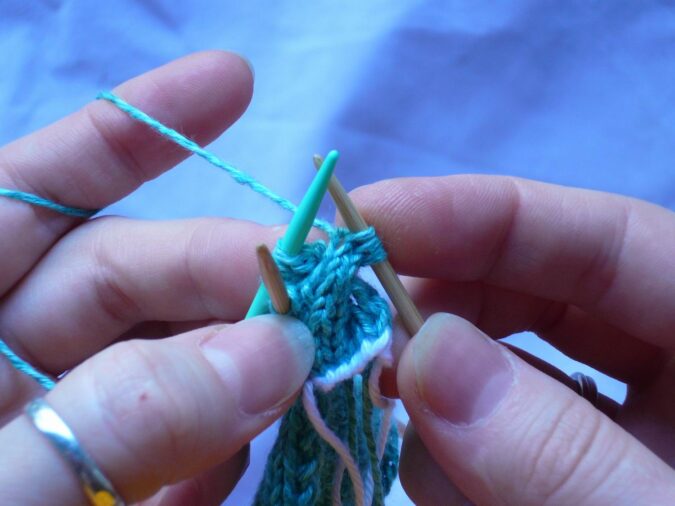
2. Slip the last stitch knitwise.
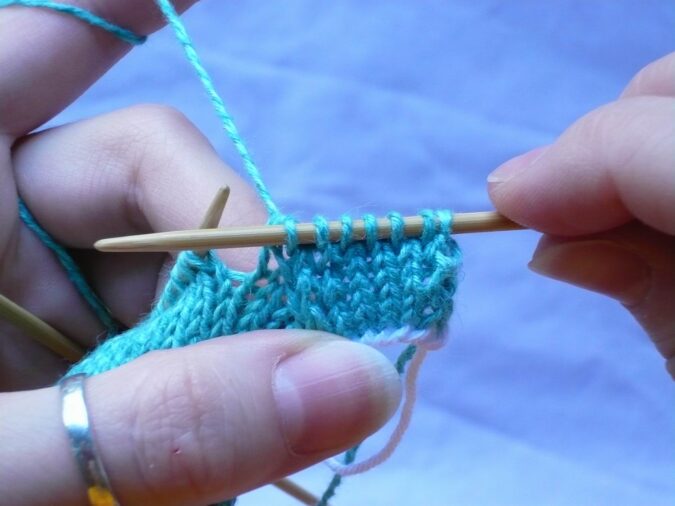
3. I had live garment stitches, so I knit 1 stitch of the garment with my cable border yarn.
4. And Pass the slipped stitch over.
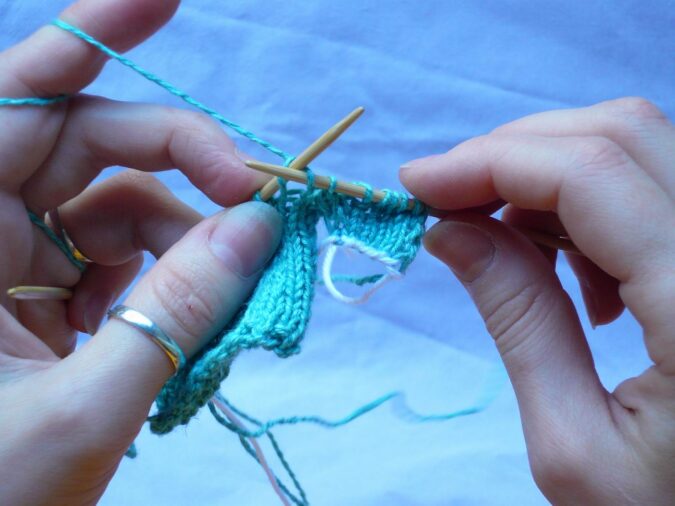
5. RS is row done, turn work and start working the WS row by slipping the first stitch.
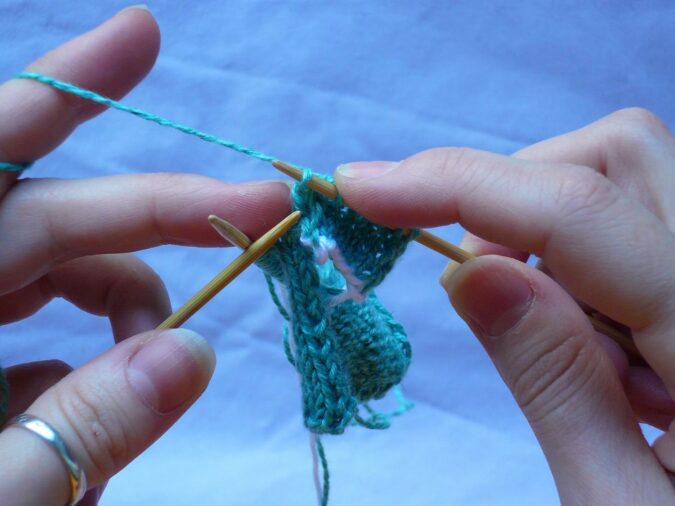
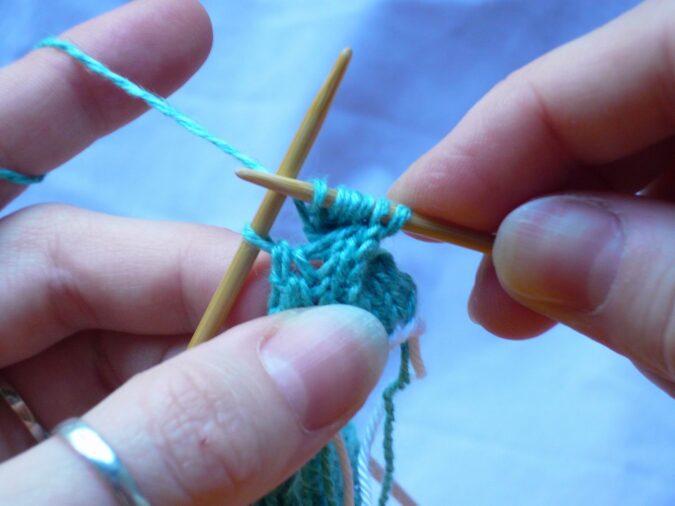
6. On the cabling row I do not like using the cable needle (few stitches to work on). But for better visual you slip the first 3 sts on the cable needle and hold them in the back.
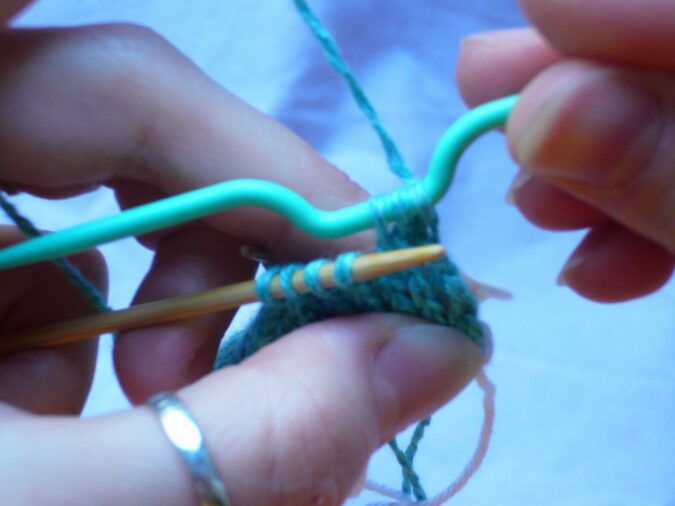
7. bring the yarn in the front. Knit next 3 stitches.
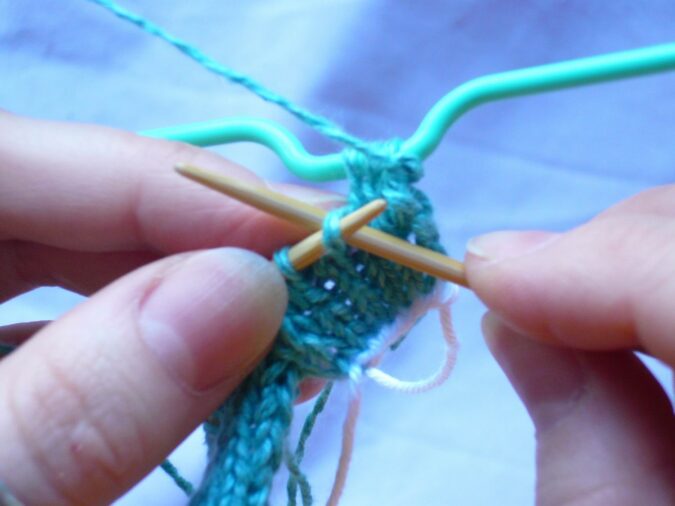
8. Then work the 3 sts from the cable needle.
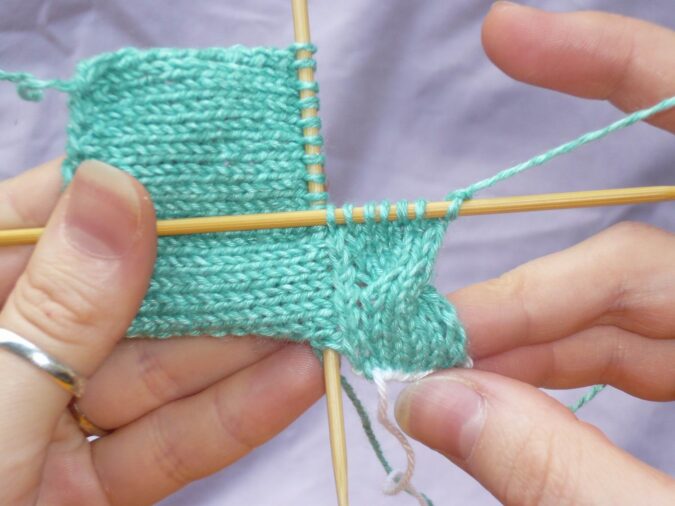
9. Work the last stitch of the row as usual on the RS row: slip, knit1, psso.
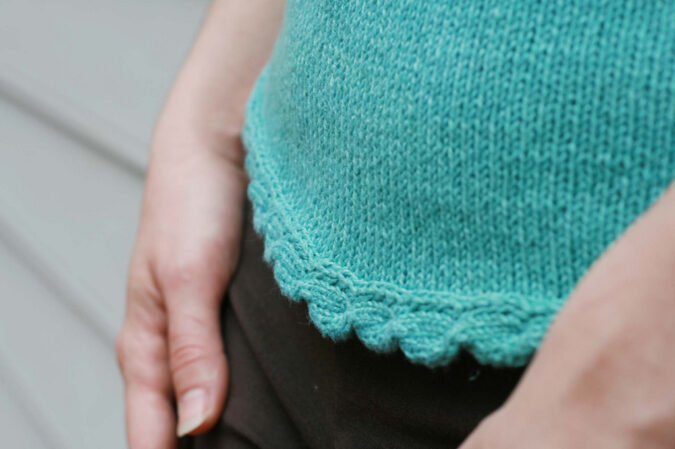
10. And this is what you get when you have the cable border knitted on the live stitches of the garment.
NOTE:
As the cable border is still stockinette stitch it will curl due to its nature, the best way to prevent this is to block and steam each curve of the cable out and let it dry in that position (if wet it will just curl back), but you can also alternate by adding 1 extra garter sts on the outside of the border to get rid of that problem.
One can also perform this as an i-cable, attached i-cord, but cabled one, I have tried it and in order to succeed in it, you will have to take needles 2-sizes down to compensate the stretch of the fabric behind your facing side. 7 stitches is a stretch for me. That method would work great on stitches from 2-4 (without cabling them apparently) to create a horizontal aran knitted on the surface of the fabric (when knitting vertically is not enough!)
Question, opinions welcome! Happy knitting!
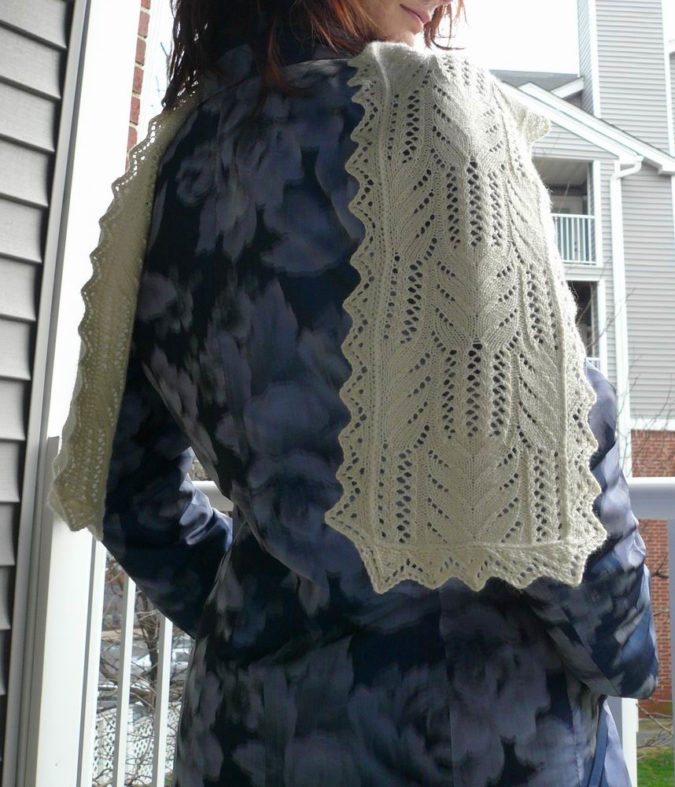
Somewhat two months ago I made this simple yet lacy and saucy scarf/shawl, named it Bear Claw Scarfette. It was really fun to knit and a great way to practice your lace skills. Here is a pattern for your enjoyment folks, it may not be right for the season, but lace yarn nowadays really is much more sophisticated and all you can indulge in! My new craving is Voile de la mer, Seaweed yarn with Seacell fibers and silk in it!
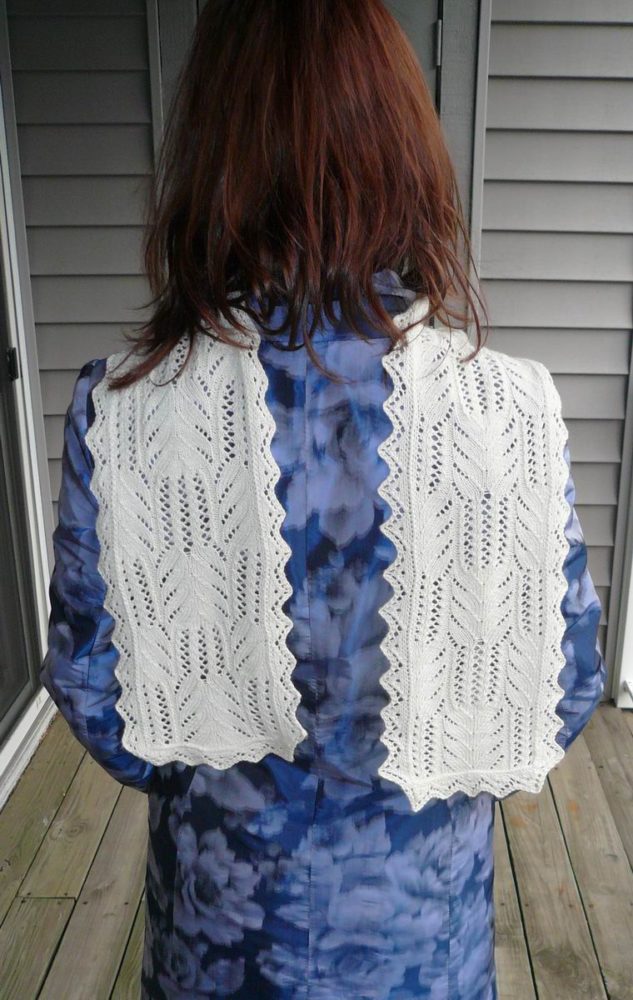
For this particular scarfette is 45″ length with the borders. Best if you have 100gr of a laceweight/fingering yarn, I had used only 64 gr for mine, hence I wish it was just a bit longer.
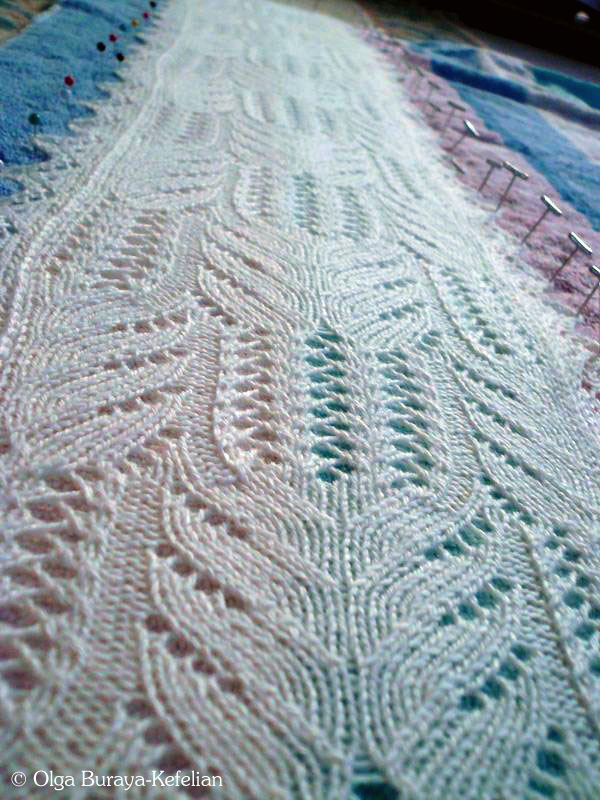
Start work by provisionally casting on 38 sts.
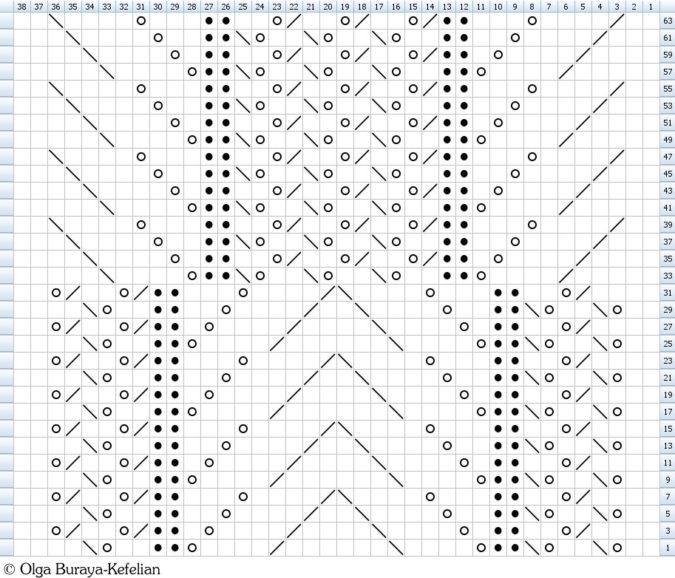
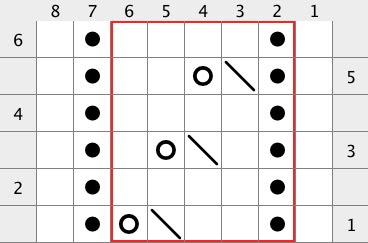
And immediately start working the lace chart.
Lace chart repeat consists of 63 rows. All sts on the WS are worked as they appear: K the knit sts and P the purl sts.
Work the repeats as much as you like to obtain desired length.
End your scarfette by knitting only half of the main lace chart. Do not bind off, simply put your sts on a needle holder.
Border:
Using provisional method and shorter needles cast on 5 sts. And start working the chart, the last stitch worked the following way:
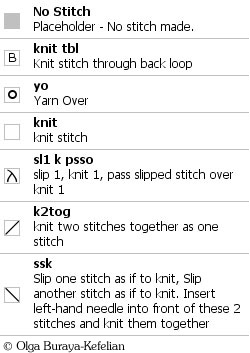
Slip stitch, pick up the stitch through the last stitch of the body of the scarf, psso. *Please see chart legend below.
All sts on the WS are worked as they appear: K the knit sts and P the purl sts.
Do not bind off, unravel carefully your provisional CO egdes and graft your borders with a darning needle to join or you can use a three-needle bind off technique.
ETA:
On the chart here is not shown black dot, which is a purl stitch. Sorry for the inconvenience.
