Category: process

Tools of the trade. Part 1


I know many of you who knit are always in search of better tools and things that make our knitting life easier as in our stitches more even and knitting itself smoother. I am always on a hunt for new tools that makes my knitting process enjoyable and finished garments a success!
During my life in Japan I have discovered several interesting items that I haven’t encountered in the US market before and I thought today I would share my new finds as well as my old favorites. With the impending move back to us I made sure to stock up on some, but I really hope that these products will be available in the future in the continental US as well.

As any ideas start from a sketch or a doodle in a notebook, I found these particular notebooks extremely convenient. The dot grid inside allows you to build a grid if you like or to draw a chart or to create a schematic for your design using dots as visual points. A5 compact format allows me to always have it with me. They are from Muji, a Japanese chain store that literally is translated “No Brand”. There are 3 stores and online store in US already, so hopefully you can get your hands on them too.


Erasable pens! Maybe many of you have heard about those, but I discovered them only recently. They are tricky though – make sure you do not expose what you have written to extreme heat, as Wendy of Knit’n’Tonic blog discovered for herself – your writing will vanish!
But these are great “pencils” as they are smudge-proof and have great line definition. Pilot Frixion gel ink in a pen tends to run out quicker than any normal pen, so make sure to get plenty of refills!


Pilot Frixion also has an erasable highlighter marker – isn’t that awesome?! Mark what is necessary and when you are done, just erase it!
And for more permanent result I use Pilot Jetstream. All of the pens above are of my favorite 0.38 mm line gauge. Thin yet, not too thin.

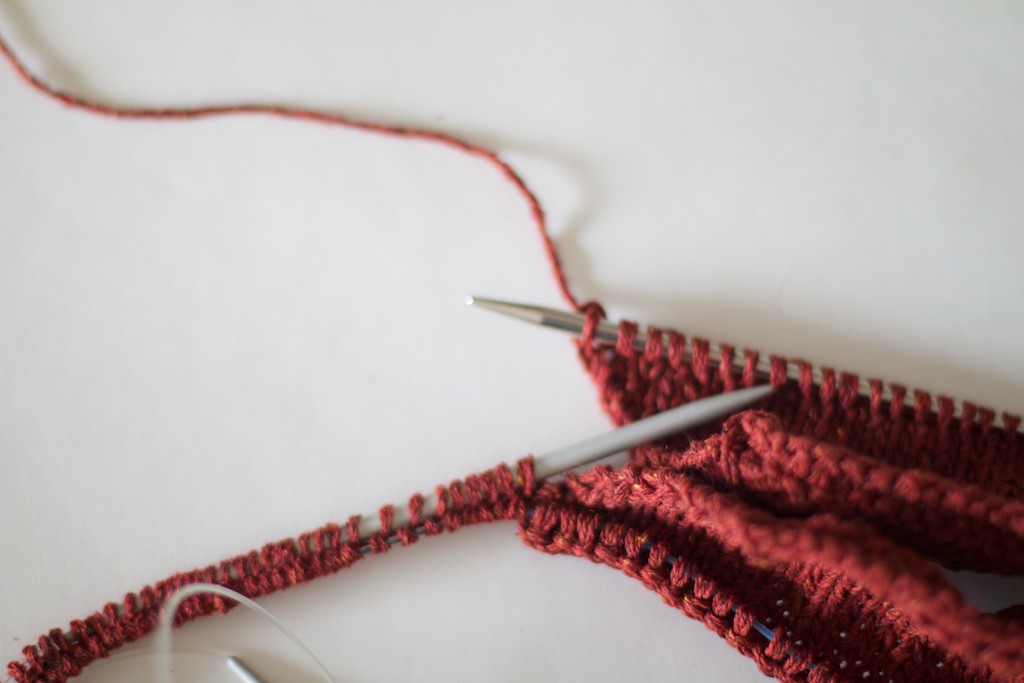
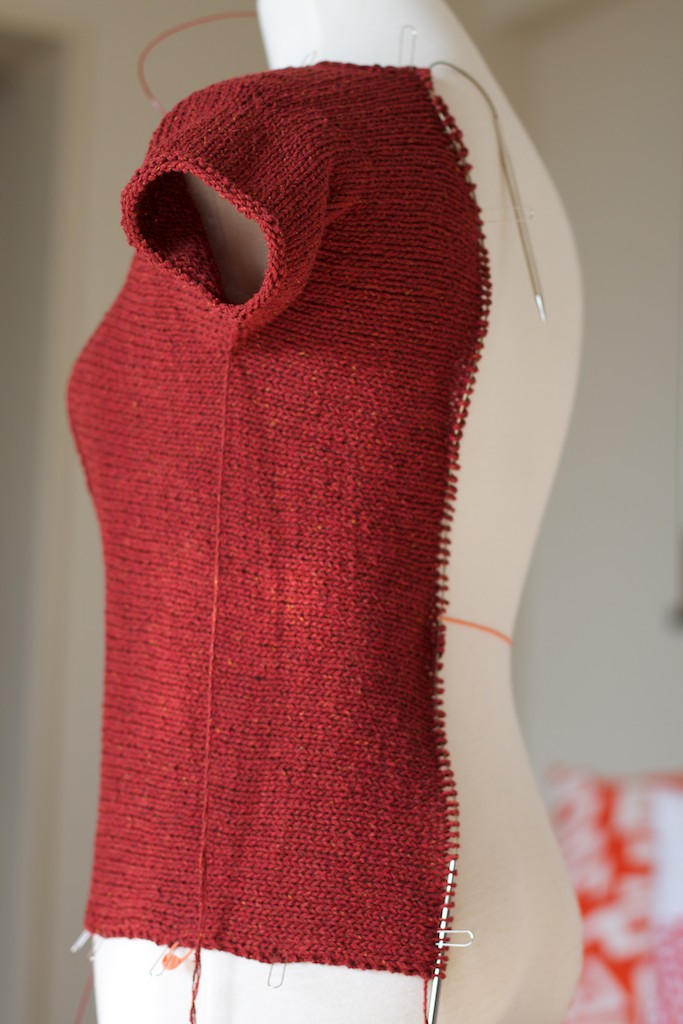
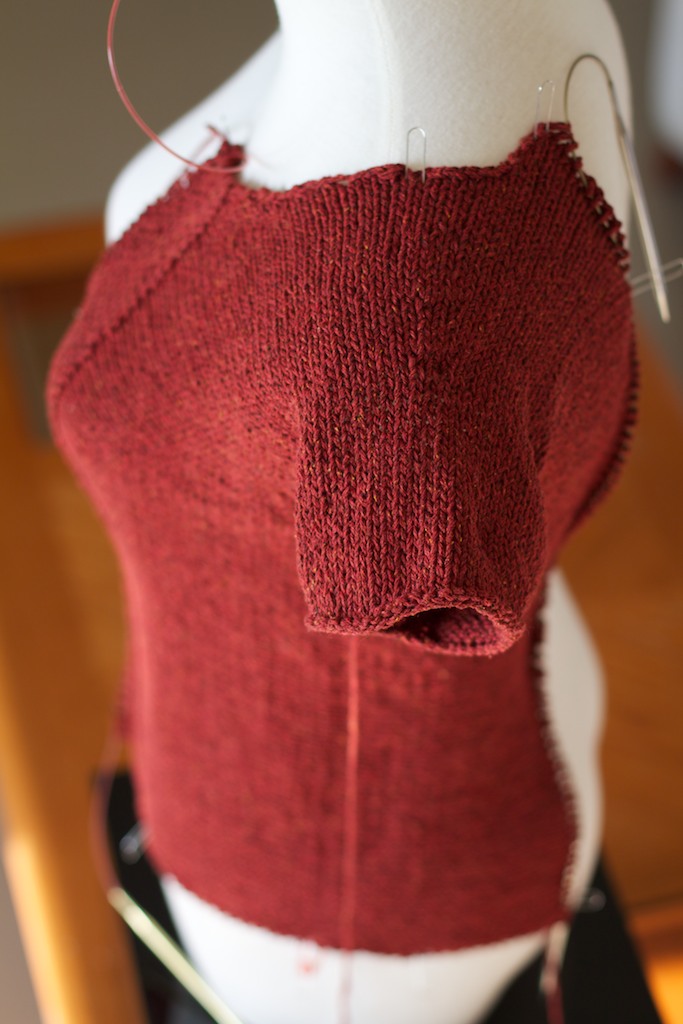
Knitting needles are the #1 tool of any knitter. I have about 60 different kinds and materials and last year I met their replacement. Certainly, I still have the old ones sitting in their case all neatly organized, but I haven’t been using much of them except for the very small sizes since I got my hands on Addi Click Long Lace Tips Interchangeable Needle set.
Holy motherload of knitting needles! Skacel did it!
Besides a fashionably trendy hot pink case there are 8 needle sizes of shiny, smooth, long and POINTY needles. Ranging from size US 4 to US 11 which includes mostly used sizes by me I do not need to use any other needles! It’s so compact that it’s easy to travel with even for a short distances. Interchangeables make life so much easier!


The shiny army of pointy needles is crucial to my knitting because I am a combination knitter or “picker” and having a slick sharp point makes my knitting significantly faster. Skacel created Clicks with several options for the sets, there are bamboo, regular and shorter lace tips  – to each their own depending on your preference and needs.


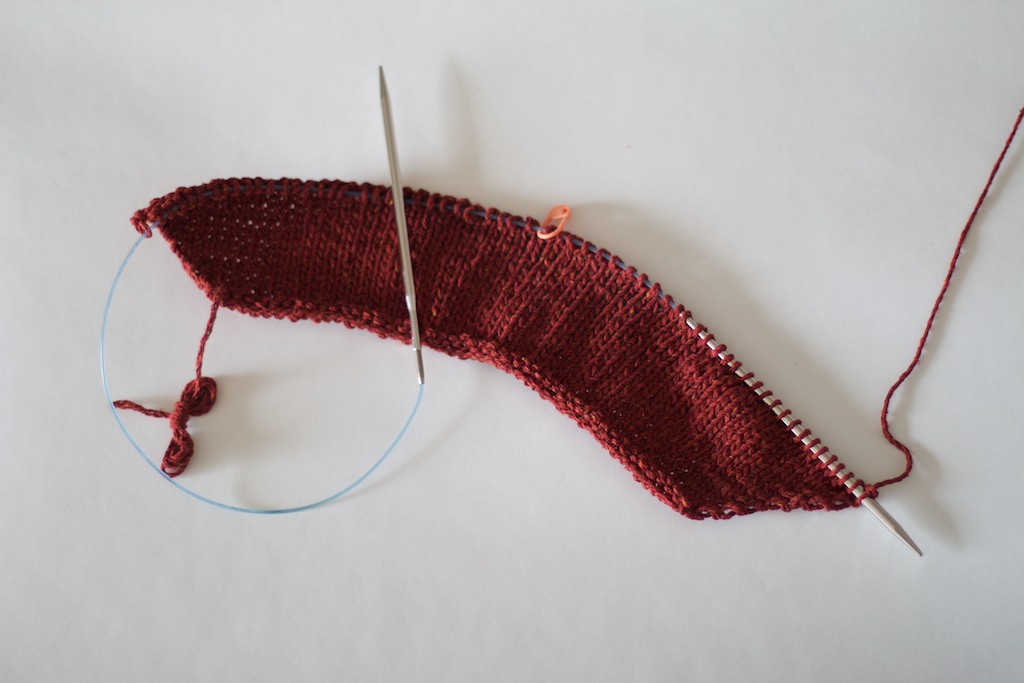
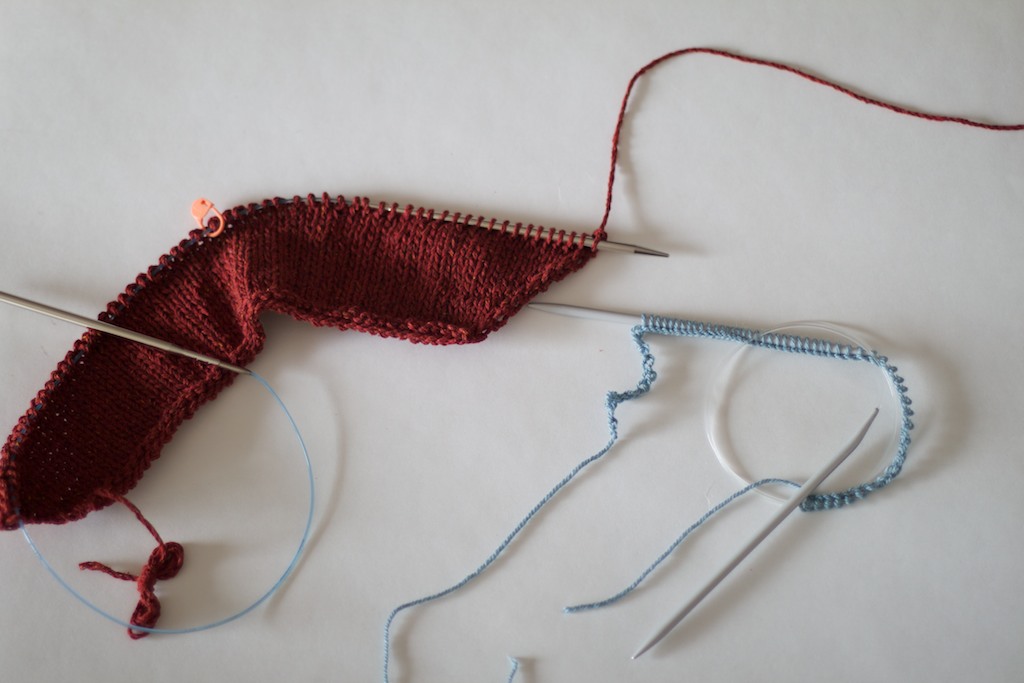
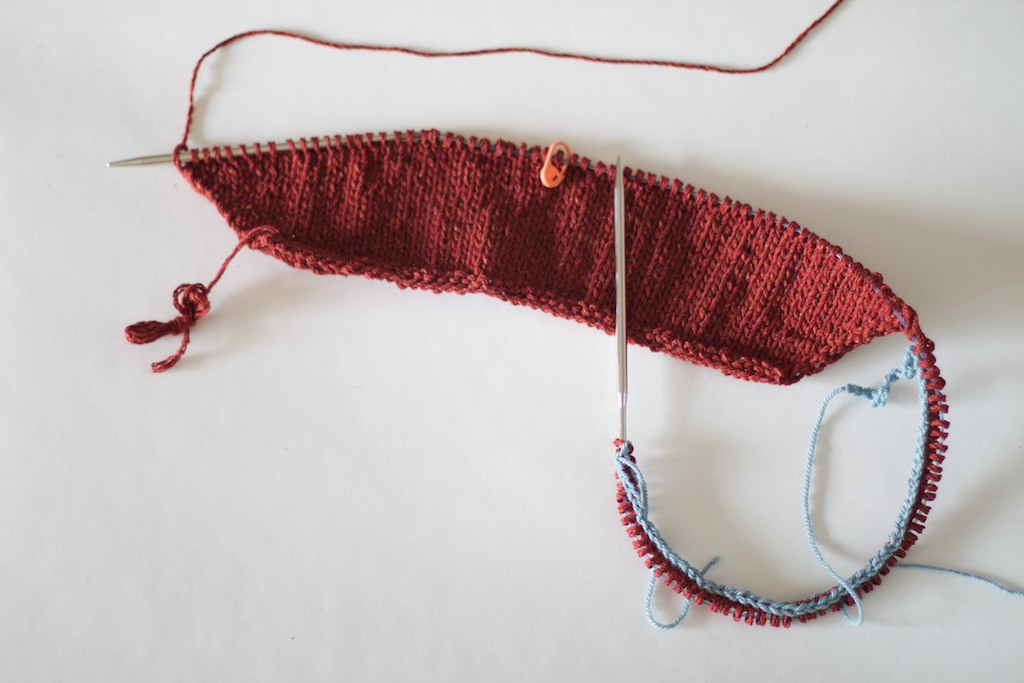
And the cords.. the cords are magical and smart! The tiny holes on both ends of the cord allow you to pull through a strand of yarn if you need to create a lifeline. Just knit a row and the strand of yarn “lifeline” is simultaneously being carried through that row of stitches. Saves time and headache when it comes to ripping lace in case of a mistake.


Skacel has made it available for anyone to purchase extra cords and tips if necessary. My Long Lace tips Clicks set came with SOS cords of different lengths and a connector, but I decided that I needed more cords and the extra cord sets come with an extra connector. Connector essentially helps to create a longer cord in case you need one and you don’t have a 60″ cord in your set, for example.


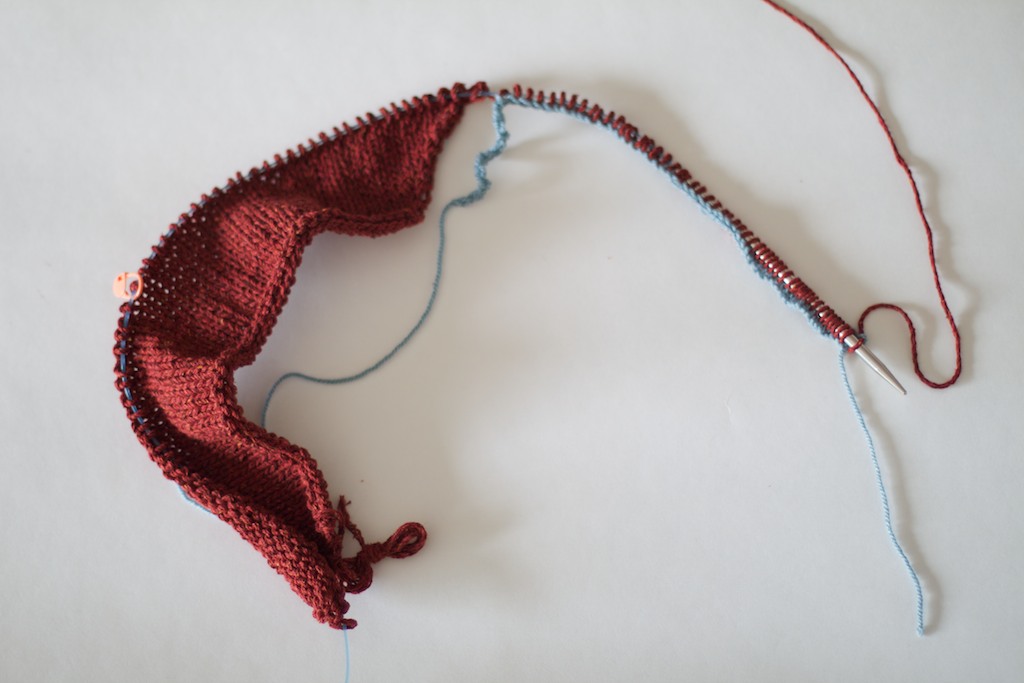
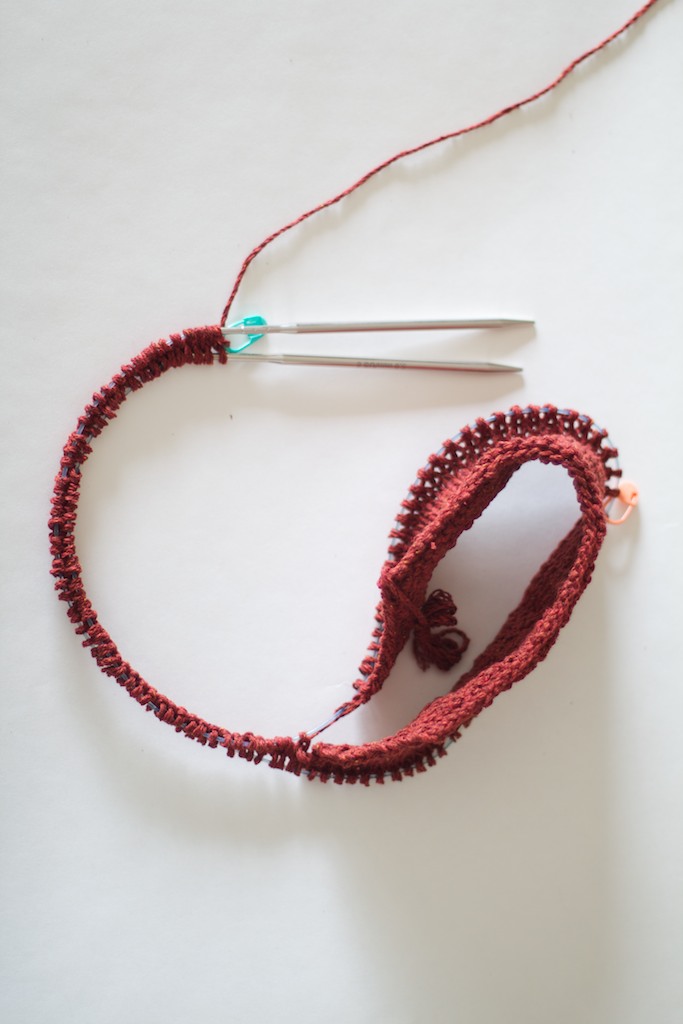
But I see more useful applications for those connectors. Something that comes in very handy if you need to use that size needle tips for something else but they are occupied in another project. All you need to do is take the needle tips off and secure your stitches by locking the cord with stitches on it into a loop with the help of the connector! Voila! And you have a makeshift stitch holder! Or a funky necklace! 😀


And you bet that me and my Addi Clicks are inseparable! I think regardless the price if you knit a lot and realize how important it is to have quality tools that feel great in your hands, better your knitting experience and result they are worth every penny!

When it comes to notions I am a known fan for Clover products and I use many of them on a regular basis. I have been using Locking stitch markers for years and they are my “work horse” markers as they serve as markers and can be used as pins when I need to hold knit fabric together when seaming.
However, I was given as a gift these Merchant & Mills black bulb pins , that I use to attach tags for my garments during trunk shows, but their unusual shape actually allows me to use them as a handy stitch marker if I don’t have others on me. There is a limitation of course what size of the needle they would fit, but I thought it was cool way to utilize the “universally useful” statement on its box.


The Clover affair continues into my collection of crochet hooks that are either teflon-like covered hooks that come in many sizes and steel hooks that are sometimes are also called “needle hooks” for finer gauge crochet. Or as I discovered they are great to use when you work with beads in your knitting. A while back when I got the steel hooks on etsy they were only available in Japan, but now I know they are widely popular and sold in US. I don’t crochet much these days except for cast on and borders, but their ergonomic handle is quite comfortable!


I prefer to use good old double pointed needles when it comes to knitting in the round of small tubular parts of the garments or accessories. And although I have several Clover Bamboo Takumi Velvet DPNs, I have been using a lot and enjoying my set of Blackthorn DPNs made out of carbon fiber composite. Carbon fiber composite that is used in making some of the jets and airplanes and I guess living on a Naval Air facility for the past 3 years satisfied the geek in me when I am using these. Light as wood but behave like metal, they are very unusual and certainly hoping to grow my collection of these through time.


More about my favorite tools of the trade tomorrow!

Circles + Dots

When I think of the time Pam Allen has asked me to design a collection for Quince & Co I kept telling myself “is this real life”? I suddenly got transported back to the times when I was starting my knitting career and looking forward to every issue of the IK that she curated at the time and browsing through numerous books that she authored in the the local yarn stores. And now I get to do this! This excitement is quite often followed by some amount of self-questioning – would she like these sketches or not? To work with someone who has been in the industry so long has tremendous amount of my respect and reverence and I certainly didn’t want to disappoint. When all the sketches got accepted (!!!) and the next stage was to pick the colors for the whole collection I couldn’t contain myself as things just got even more real.


The inspiration for the Circles + Dots palette served this image for the Finch release as it comprised a harmonious combination of brights and neutrals, especially those hues of turquoise and orange, the colors that my blog used to be. And although I studied art at school for several years my sketching skills often leave much to be desired, however they conveyed the intent.


As you can see some designs went through transformation. The entire process is about making decisions what to add or what to get rid of in a finished design and it is done so to improve the wearability of the actual knits.
My initial idea was to make this collection a story of exploration into knitwear where dots and circles are represented in all kinds through various knit techniques. My interest in polka dots in particular started back in 2011 when I designed my Mizutama shawl in search of wanting to create a polka dot looking shawl without going the obvious route of intarsia. It got me thinking that there are more ways possible to create circular shapes with various looks and patterning in knitwear and I wanted to gather them together for a collection in such a manner that would show the correlation but have different placement, yet feel cohesive and “together”. 2 garments and 3 accessories comprise this collection. I thoroughly enjoyed working the gradually decreasing in size eyelets for Flotilla Mittens and working the three-dimentional texture of Cowry Hat. Even more so developing a special stitch pattern for Effervescence Cardigan, the stitch that looks both eyelet and cables at the same time.
This creative process is slow and lengthy but all the efforts are worth it in the end. When I saw the final images, I was really stunned by the great light , composition and complimenting styling done by Quince & Co that brought the entire collection together in a beautiful narrative that I am very proud to be a part of.

I will let the images speak for themselves though, you can view an entire lookbook to enjoy pretty photography here

Compass Pullover


Cowry Hat


Effervescence Cardigan


Flotilla Mittens


Gyre Scarf


You can queue and favorite all the garments and view the collection on Ravelry here.
And please share your thoughts and impressions about Circles + Dots with other knitters in Olgajazzy designs group on Ravelry. I would love to hear some feedback and color choices for your own knits from this collection!
This collection is available as eBook for USD 18.00 and all patterns are also available individually.

$18.00

HAPPY KNITTING!!!

All images in this post are © Quince & Co/Carrie Hoge


Sanagi Dress

While on the subject of linen, I have to mention about my discovery of a brand new linen yarn to the market by ShibuiKnits yarn company. Shibui Linen is a linen yarn with a chainette construction that comes in array of vibrant and lots of neutral colors and I was lucky enough to grab a bag of it for my new “transformer” knitwear design.
When trying to make the right yarn choice it contained all the necessary properties that linen usually does plus a range to work with – single or double or even triple stranded. This certainly opens up more options for one to experiment with this linen.

Today I am very excited to share my new design – Sanagi Dress.Originally inspired by a skirt I have designed for Ori Ami KnitsAirfoil skirt – Sanagi embodies bigger and more wearable garment with a range of styling looks.

When sides become swinging neckline.

Neckline becomes armhole, while sides create a decorative pleat in the front and the back.

Tied in the back, a la Apron Dress.

With I-cords tied on the inside, creating a more straight silhouette.

And many many more!..

When Sanagi design was being planned I started by wanting it be worn at least three different ways but upon my progress I have discovered that this idea is expandable by implementing several notions. There are at least 10 styling looks presented at the moment, but I am sure you can explore and find even more.

Constructed to be worked in the round, seamlessly, the fabric is completely reversible! You may want to have circular needles in 2 different lengths to make it easier for you to try it on as you go. And imagine instead of buying 1 pattern that will only look 1 certain way, here is one that yields at least 10 different ways. You don’t have to like every single one of them, but you can find several ones that suit your taste and body shape the best.

And to know how to wrap all those particular styles I have created a styling video where you can practice and learn all the Sanagi ways.

Pattern Specs:

LEVEL
Beginner
TO FIT BUST
30-32 (34-36, 38-40, 42-44, 46-48, 50-52, 54-56)”
FINISHED MEASUREMENTS
Around bust 68 (76, 84, 92, 100, 108, 116)”
YARN
ShibuiKnits Linen (100% linen; 246yds/225m; 1.76oz/50g):
7 (8, 9, 9, 10, 11, 12) skeins in Graphite #2002
OR 1576 (1772, 1970, 2166, 2364, 2560, 2758) yds of any other fingering weight yarn (to be worked held double)
OR 788 (886, 985, 1083, 1182, 1280, 1379) yds of any other worsted weight yarn (to be worked as single strand)
OTHER SUGGESTED YARNS
1 strand
Louet Euroflax Sport
2 strands
Habu Textiles A-1 Tsumugi Silk
Habu Textiles XS-55 Linen or Habu Textiles A-174 Cotton Gima
NEEDLES
US 7 (4.5 mm) circulars 29”, 47”, and 60”
US 7 (4.5 mm) dpns (for I-cord)
GAUGE
18 sts and 26 rnds in 4”/10cm over St st swatch worked in the round with yarn double stranded

Queue on Ravelry

USD 10.00

Giveaway Alert!!!
Fun times ahead!
Lucky 3 commenters would receive a copy of Sanagi dress pattern pdf.
But only 1 of the lucky three will ALSO get Shibui Linen yarn  enough to make Sanagi dress in their size!!!

How to enter this giveaway:
Leave a comment for this post below by midnight on Saturday EST, August 25th, 2012.
AND
Like Olgajazzy page on Facebook or Follow olgajazzydesign on Twitter
Winners will be drawn on Sunday, August 26th!
ETA: Please include your Rav ID or email to contact you.

GOOD LUCK AND HAPPY KNITTING!

For the love of linen

I grew up a country that is well-known for growing lots and lots of flax and linen was implemented in everyday life for many many years, but at times we don’t get to appreciate what we have and admire what we have till we travel the world and see others’ fascination with this amazing fiber.

I have been collecting skeins of linen yarn produced by various companies for years now and every time there are some new properties I found admirable about them, compare them and dream of a perfect project with them.

Living in Japan has certainly makes you notice and give more appreciation for the linen garments and fabric, here it’s almost as expensive as gold as it is a very sought after fabric and garments to be worn in extremely hot and humid summer. It’s considered luxury to have numerous linen everyday items around your household, but once you are aware of them it makes you even more appreciative than before. Take LIN-NET store/company in Kyoto for example, Japanese made linen is quite exquisite. And another quite popular Japanese company Fog Linenwork that has their products made in Europe for Japanese market.

Linen knitwear is joyous to wear as it keeps you cool on hot summer days and wicks out moisture but it provides amazing drape as well. Once you figure out how to take care and handle your linen it’s all you really want to have around.

I have stumbled upon this movie a while ago and it’s simply amazing with gorgeous cinematography, makes you fall in love with linen all over again.

BE LINEN MOVIE IN ENGLISH from Linen and hemp community on Vimeo.

I have been browsing some items for my wish list and linen was getting more and more attention. Dreaming of one of these linen throws for my couch during summer. Love the polka dotted one especially!


During my recent travels I did pick up some amazing screen printed linen from A Verb for Keeping Warm and made this new pillow for my couch. Invisible zipper and all. Sometimes it takes as little as sewing a new pillow to want me sew more…

And in between knitting on my very wooly deadlines this summer I got to squeeze in some knitting a new design with wonderful linen I had in my stash for a while. Here is a sneak photo of it. And pattern is coming up this week.

Decyphering Francis

Since Shibui Silk has been out for 2 months now and nothing makes me happier than eager knitters itching to put those projects on their needles. There have been lots of questions and inquiries about Francis and today I am going with a little step by step tutorial with photos what makes this tee so innovative – construction.

Francis is worked horizontally and in 2 parts. Beginning with the sleeve and working towards the middle of the front, while both backs are worked using short-row shaping, then overlapping. Yet there are no side seams, no shoulder seams. I know for a fact many knitters do not like seaming knits. I truly believe there are times when seams are a must simply for preserving the structure of your knit garment and you have to account for likely fiber behavior in your yarn after washing and wearing. But at times when I see there is a chance of making seams invisible – I am all for it.

In case of Francis, although body is worked straight along the sides, the opening on the back is very flexible, that helps the Tee to acquire that slightly flared silhouette. And in case if there were side seams, they would naturally be riding up the front and be quite noticeable. Being a detail oriented perfectionist I didn’t want those visible details and Heichi is strong enough yarn to support this tee’s structure, so I have figured out how to make it go away.

1.


Starting with the sleeve and working your increases all the way till shaping is complete, ending with WS.

2.


Next step would be casting on stitches with scrap yarn provisionally on a spare needle.

3.


With yarn still attached to your sleeve, purl across freshly cast on stitches.

4.


Now working on RS knitting across all of your stitches on the needle to the other end of your sleeve.

5.


This step is a little bit fussy. But you unravel scrap yarn from provisional cast on and place those stitches on spare needle.

6.


And this is the part that probably caused most confusion. Fold your sleeve slightly in half to bring your work needle to underarm/armpit to meet the beginning of your spare needle. Knit across those stitches on spare needle.

7.


In this step many have found it hard to work just with one long circular needle, so you can split your stitches between working and spare circulars. But what is happening here – you work from front hem up towards the shoulder, across your shoulder/sleeve, down towards the back hem. As one of knitters correctly compared it – you are working a “big upside down U”. And as you progress, you will find more fabric growing and working needle being sufficient in length to accommodate your knitting.

Use your tail to seam the sleeve seam and use excess of it to close up that underarm hole if necessary.


So ultimately, that invisible seam can also be worked in another way. If you are familiar with Eastern or Figure 8 cast-on methods, you can wrap yarn around both ends of spare needle and work it that way too, only from my personal experience I have encountered those methods to be a bit loose after first row and in need of tugging out/adjusting, while Provisional method I used avoids such problem.


View Francis projects on Ravelry knitters are working on or already completed

Francis in images above is being made in Brick and I can’t wait to finish it. Weather is warming up in Japan so it works as a great season transitional garment, to layer or as is. Heichi comes in array of trendy colors and lots of neutrals as well.

FRANCIS SINGLE PATTERN PDF
8.00

NB!
Couple days ago there has also been some errata discovered and I have updated Ravelry design page for Francis, but I am posting existing errata below as well.

Errata for the printed booklet ONLY:

For Left and Right Back Neck Shaping:
77 (80, 82, 85, 87, 90, 92) sts rem.
Work 31 (33, 37, 41, 43, 45, 49) rows even. Piece should measure approx. 5.25 (5.5, 6.25, 6.75, 7.25, 7.5, 8.25)” from last neck dec.

Bind off for the right back:
Next row (RS): Work to end, picking up and purling wraps tog with wrapped sts as you go. BO all sts kwise on the WS.

Holiday giveaway

Less blogging, more knitting these days. These are not particularly words to go by, but not so much of personal knitting.
Around this time last year I have been working with Blue Sky Alpacas yarn company on creating new designs for this fall/winter season.
Notice the gorgeous models that are are modeling my knitwear designs, great styles and photography too! I feel really lucky to be able to work with this company and their luxurious line of yarns.
As a result you can see 3 various garment designs using Suri Merino, Sportweight Alpaca, Brushed Suri and Techno…

Pleated Jacket
View on Ravelry

While constructing this design, I really wanted to make it with little seaming as possible while trying to incorporate this wide box pleats collar. I have succeeded in doing so, this jacket is worked top down and you only have 2 small seams to complete once you are finished knitting. Classic feminine design with modern detailing on the collar.

Fitted Lace Pullover
View on Ravelry

In wintertime it is great to have one of those fitted thermal go-to sweaters that you want to wear around all the time and depending on your color choice you can have one transition from casual to evening looks. I have chosen to use 100% alpaca yarn but the idea of wanting to balance out the heat factor, since alpaca is 30% warmer than wool, I have chosen to go with this eyelet lace pattern and evenly distribute it throughout the pullover. It creates sort of “vents” for your skin. Finished with ultimately luxurious and soft Brushed Suri collar caressing the neckline. So your choice of favorite denims, favorite slacks or a full skirt!

Aprés Vest
View on Ravelry

I was among the group of few designers who got to test this new yarn and create initial designs from BSA Techno. This yarn features amazing construction on its own – a mesh tube that has alpaca fibers blown into it, which makes this yarn air-light and luscious, as good as luxury comes! For example, if you make a cabled coat in it, it would weigh much less, it is not spun but it reminds me of woolen spun yarns, that are lofty and soft and light! The vest I have designed using Techno is suppposed to mimic one of those down type vest you wear in cold season either to layer or to throw on for a car ride. Despite being so lofty, it is very warm as it majorly consists of alpaca fibers.
And yes this is beautiful Raina from American Next Top Model modeling the vest! (She recently appeared in Bon Iver music video! Love that band!)

So as a gratitude to all my supporters and in lieu of upcoming holidays I am giving away 3 sets of patterns, each set contains a printed copy of each the designs above.
Rules are simple, leave a comment on this post by Tuesday, December 13th, 1:00AM EST
I will randomly choose 3 winners and announce them later on the blog.
For all participants, please leave a valid email address or link to your valid blog, so I can contact you later.

Good Luck To Everyone and Happy Knitting!!

Knits and pelts


Have you ever as a crafty person clung to fabric leftovers for years in hopes that one day you’d have just the right project to use it for? I know I have… and as much as many of your would like deny that once you deal with fabric or string or yarn.. it’s hard to get rid of leftovers in general! Your mind doesn’t always come up with ideas that very minute, but in some time you hope it does! This same route I’ve been going ever since I’ve discovered this faux fur! Honestly, it’s the best faux fur made in the world, so I am sure you can see my point about holding on my scraps…

I have had this idea for a while, but as usual timing and whole slew of things in the way… Finally, I made it! The hardest part was picking out the color of the yarn that would match my faux fur color close enough, but yet not distract with its texture or color variation.

Faux fur produced by Tissavel is one of the best in the market, Made in France, feels and looks (most animal prints at least) like real fur. So real, in fact, one day in D.C. I was walking to work from a metro station and startled by some (PETA?) guy screaming: “Do you know what your coat is made of?!!!” To which he heard my response: “Yes, cotton and viscose!” He was stunned and I walked away winning! 🙂 So my point is that this faux fur even with undercoat of different shade looks very real. I know if one touches it – all you’ll want is to pet it all day!

I’ve had some Tissavel leftover pieces from my mom’s work for a while now. I know even some friends of mine got bits of it here and there as well, it’s really great!

But if you are not a fan of sourcing out a pieces of faux fur you like or fuss over sewing at all, you can go knitting route all the way. And you can do that using two methods:

First, you can find the yarn like Berroco Nanuk or other fluffy yarn that would make a nice cushy pelt for the center of your scarf.

OR

You can knit ANY yarn to create center rectangle using Loop Stitch technique. I suggest using some yarn with a great content of alpaca or suri, so it’s even fluffier. If you wish you can even cut those loops, so it’s more fur looking… Kind of like this Stella McCartney fur vest.

Fur substitute rectangle should be 12″ by 14″ if knit flat, when folded and seamed into a tube it should measure 6″ by 14″.

Now for the ends:
I’ve used Pear Tree 4-ply Merino yarn, which is 100% Australian merino. It’s more of a DK weight and I used US 6 (4mm) needle to go with it for my knit 2, purl 2 ribbing pattern.
My gauge is 7.5 sts per 1″ over Ribbing pattern.
You can choose a different stitch pattern for knit part of the scarf as long as you get the necessary dimensions.
Scarf width should measure 6″ in washed and blocked form. I suggest to make a little swatch to calculate correct number of stitches to cast on for your yarn choice and needle size.

Cast on 46 sts.
Row 1: *K2, p2*, k2.
Row 2: *P2, k2*, p2.

Repeat rows 1-2 until scarf end measures 35″ from CO edge. BO all stitches in pattern. Then make a second scarf end identically. Weave in all ends, soak and block your knit scarf ends to measurements.

For faux fur insert cut 12″ by 14″ rectangle plus 3/4″ seam allowances.

Fold the faux fur rectangle with public side facing inside, then pin first scarf end to the right edge in place between 2 folded ends of the fabric. Stitch by hand to hold in proper place, making sure that sides of the scarf do not bleed over the marks where the knit insert has to be stitched.

Take second knit scarf end and repeat as for the first scarf end only pinning it on the other side of the faux fur rectangle.
Once knit scarf ends are placed properly, use sewing machine to stitch the scarf ends securely in place. You can go over it several times if you’d like.

Then shift both ends of the knit ends to one corner. Pin, then hand stitch to hold in place along the side. Machine sew along the edge to close the side of the rectangle as much as possible with ends still sticking out. Trim excess selvedge fabric.

Carefully pull on the knit scarf ends and turn faux fur rectangle inside out. You’ll have two scarf ends attached to a fur rectangle. Last piece of business is closing that small opening. Using sewing needle and matching sewing thread hand stitch it closed by inverting the selvedges inside along the lines and sewing it shut in a manner of small Mattress stitches.

Voila!!

Now you can get one yourself as well or there is still time for holiday gifts!!
Happy Crafting!!!

Hado for your head

How did October happen already? Summer.. is if it never happened, the busiest time for knitwear designers, getting all delicious knits ready for Fall/Winter collections. But I want to still document and share my year’s work.

All the way back in early Spring I have been asked by Andie of Renaissance Hand-dyed Yarns to consider creating a design using her naturally dyed yarns. That was what draw me at first, but who can pass up an opportunity working with Blue-faced Leicester wool, that is one of the softest and luxurious things in this world! While swatching and thinking of the possibilities I have decided to settle on this lovely color combination pack to create a slouch hat. Not just your regular slouch, cool enough to show off the colorwork and with some lace thrown into it..

It almost has a Missoni feel to it, but what is great – one can easily choose to customize it. I have worked it using 4 colors in this pack, but one can easily choose to make it a solid version or even transitional colors to show off “ombre” effect.

Hado Slouch

Hado 波動 (jap.) – wave motion, surge.
Colorful reflections on water surface and gentle breeze waves are recreated in this slouchy hat through intuitive lace pattern and combination of stripes to brighten up a chilly day and keep warm.
Fingering weight
24 stitches and 56 rows = 4 inches in 3 by 3 rib on smaller needle
400 yards (366 m)

$6.00

This design has great potential for leftover fingering yarn, another stash-busting project or a gift that can be loved and well-appreciated. Taking a page from recent madness over Missoni line in Target, you can easily make some for yourself if you are a fan or have missed that event. I am a known “offender” in loving chevrons, Missoni-styles, so you can also see my other designs like Serapo Hat and Palisel Hat.
Now I will be back with more once I finish some pattern writing for new designs 😉

Movement

I have been back to Japan for a month now and it has been so incredibly filled with events. Work to catch up on, visiting places around Japan, trying to appreciate every single day I get to spend here. We went to Kakegawa Castle and visited 7 waterfalls in Shizuoka Prefecture. Have also visited heart of Edo period in Japan which is in Kawagoe and got to see where one of the most popular shoguns was born and resided. Life seems moving forward, Japanese are so resilient and signs of disaster are almost not there, they certainly appreciate all the business and nothing makes them happier than seeing tourists and people visiting their historical places. So we try to show our support as much as possible.

As rainy season sets in, I try to find some comfortable clothing to get through it. And my rainboots… I am so happy I’ve invested in them last year because I literally live in them.. Last Saturday we set on our way to Hakone and Lake Ashi in the mountains. When we got there, weather looked like a hurricane and besides treacherous winding roads you could barely see anything, complete white out. And today it’s raining again…

Paper crane garlands in Buddha Museum

This week was also another exciting development. I have bought a knitting machine, a Japanese one and I love it! My Australian knitterly friends have been at it recently A LOT!
With a help of my Japanese friend who helped me sort out through some Japanese Yahoo auctions, I have bought a brand new, as in very very old, but in original packaging and never been used Brother machine for almost nothing! They stopped production of Brother machines in 2000. I looked on eBay, but no one would ship them to me. I have always wanted one, I was afraid that it would eat into my hand knitting time, but fear not. It’s solely for making some fine knit clothing. The kind that takes forever to knit on tiniest needles (not like I haven’t already done that before). Whole concept of machine knitting is more technical and I find hand-knitting still more methodical and appealing to me. But it certainly triggered more ideas for designs. Funny thing how inspiration works.

General life of a crafter consists of dipping into other kinds of it as well. I have been really into making some funky and simple jewelry. I am sure many of your have already heard of Pinterest and it is just an amazing source for pinning all things that interest you… instead of saving all those images on your computer. You get to organize and remember them!

2 weeks ago I went to Yuzawaya, got a box of paper clips and electrical tape. $4 dollar necklace. Yes, please!