Thank you everyone on your warmest comments and wishes on my finished projects! It has seemingly warmed up here, and mid 80ies trying to get you to the outside events, knitting 100% wool on the balcony in the sun afterall may not be such a good idea =)
Here is relatively new section of my blogging experience: tutorials and know-hows.
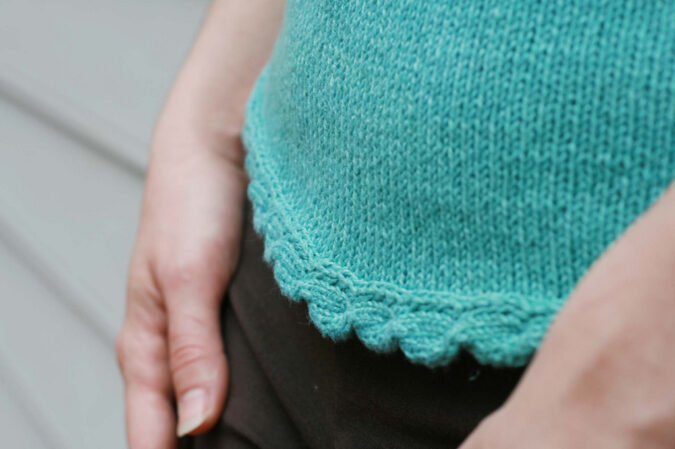
Most of us know the idea of a knit-on border. When there is a piece of knit fabric that you create as you go whether it’s lace or cable you work it and attach every row onto your garment. In this case you will always slip the last stitch of your RS row and pick up a stitch (or knit a stitch if the stitches are live) from the border of the garment and pass the slipped stitch over. Turn work and on the WS slip your first stitch and continue the row.
Note: Gauge of the border and the garment may vary, so make sure how your tension works for you: you may want to go down or up one size of the needle.
To make is easier with the numbers, I made a chart and a legend to make it easy:
Using scrap yarn and provisional cast on method with a hook cast on 7 sts. Next RS row already start knitting with main yarn the 1st row of the pattern above.
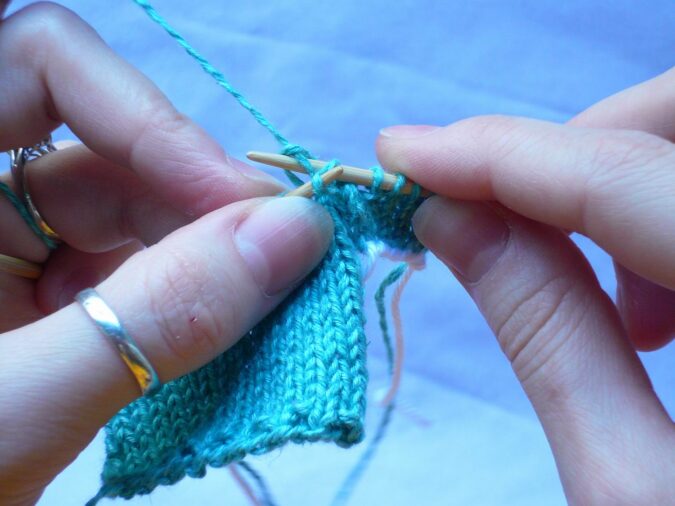
1 . Work your row to the last stitch.
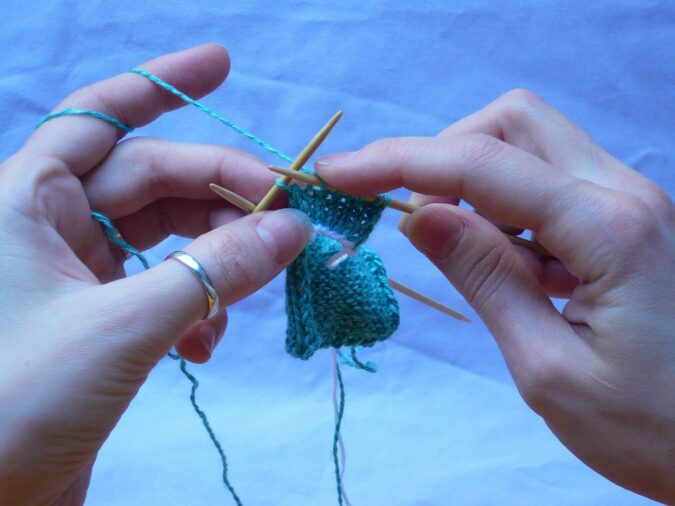
2. Slip the last stitch knitwise.
3. I had live garment stitches, so I knit 1 stitch of the garment with my cable border yarn.
4. And Pass the slipped stitch over.
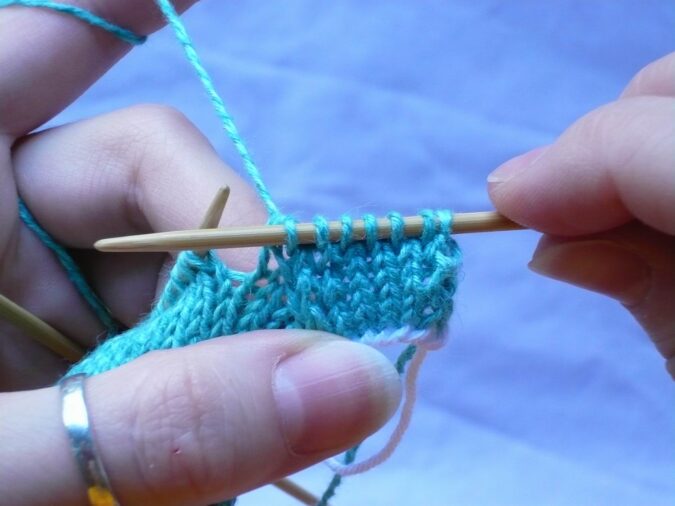
5. RS is row done, turn work and start working the WS row by slipping the first stitch.
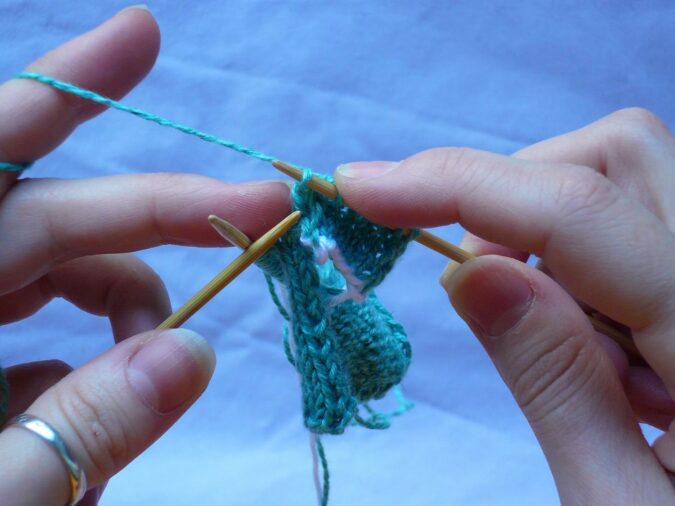
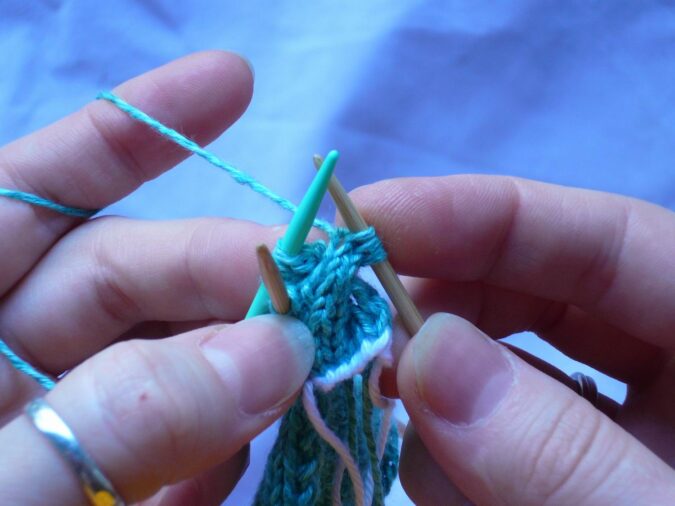
6. On the cabling row I do not like using the cable needle (few stitches to work on). But for better visual you slip the first 3 sts on the cable needle and hold them in the back.
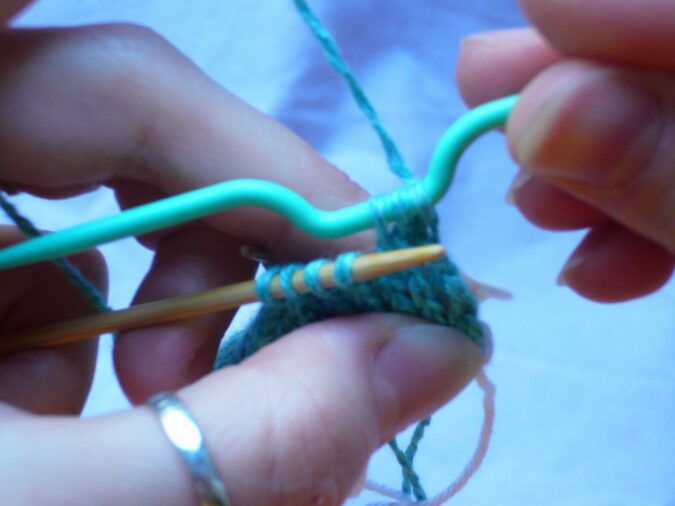
7. bring the yarn in the front. Knit next 3 stitches.
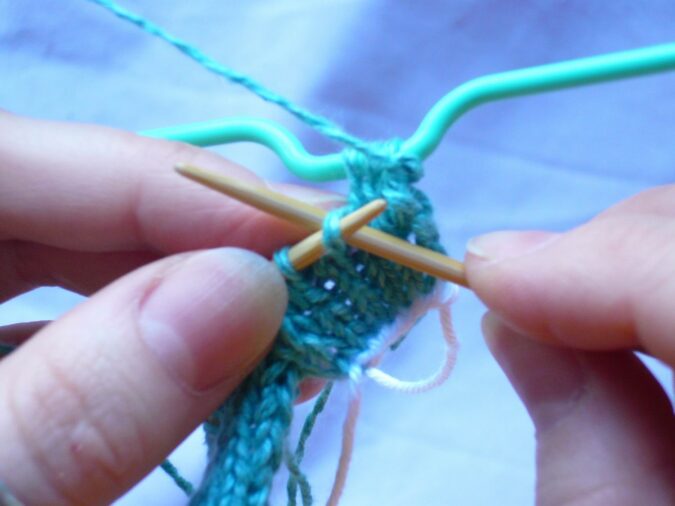
8. Then work the 3 sts from the cable needle.
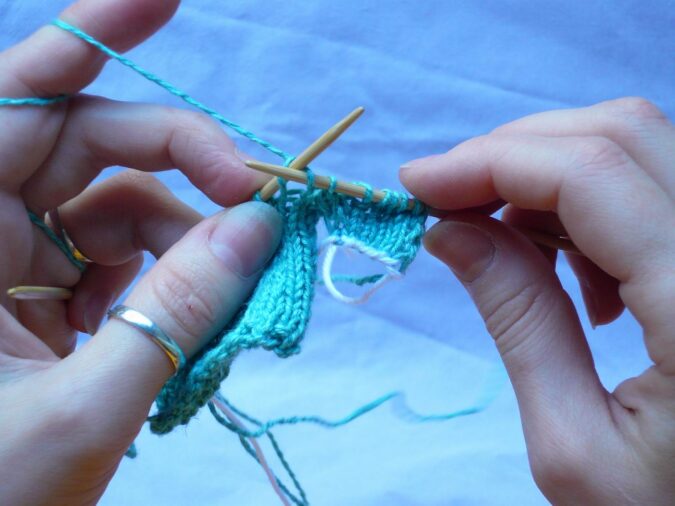
9. Work the last stitch of the row as usual on the RS row: slip, knit1, psso.
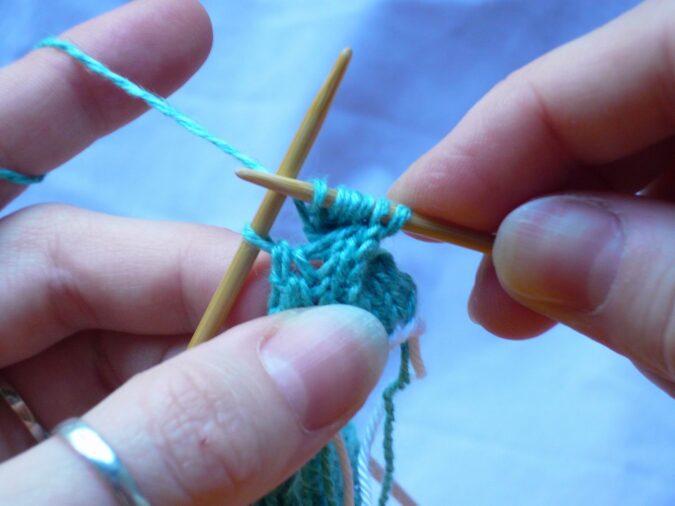
10. And this is what you get when you have the cable border knitted on the live stitches of the garment.
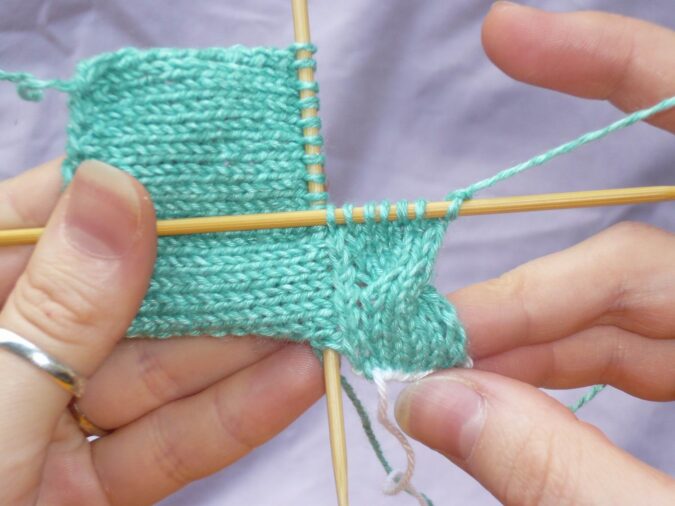
NOTE:
As the cable border is still stockinette stitch it will curl due to its nature, the best way to prevent this is to block and steam each curve of the cable out and let it dry in that position (if wet it will just curl back), but you can also alternate by adding 1 extra garter sts on the outside of the border to get rid of that problem.
One can also perform this as an i-cable, attached i-cord, but cabled one, I have tried it and in order to succeed in it, you will have to take needles 2-sizes down to compensate the stretch of the fabric behind your facing side. 7 stitches is a stretch for me. That method would work great on stitches from 2-4 (without cabling them apparently) to create a horizontal aran knitted on the surface of the fabric (when knitting vertically is not enough!)
Question, opinions welcome! Happy knitting!

woah–techie! great instructions and pics. thanks for sharing this.
awesome! such useful photos, too — thanks for taking the time, Olga. 🙂
this is a great tutorial.
Oh, I never even thought of doing a cabled i-cord!!
Nice tute! Your pictures are very clear. I have one question: when I’ve worked borders on a lace shawl, I usually knit together the last st of the border to one live st. Does working it as skp make a big difference? On your pic it makes a nice column of knit st! Have I been doing it wrong? 🙂
Awesome, thanks! I’m bookmarking this.
Girls, you are all very welcome! I hope you enjoy this and will find it useful one day!
OMG! olgita tutorial!! I LOVE IT! Now when i can’t call you for help, i will just check the blog!
Brilliant. I’ve been wanting to try this technique for a while, but somehow never got around to it. Now, with your clear photos and explanation, I really have no excuse. I have a St. Brigid UFO in one of my baskets that needs assembling and I should attach the collar this way instead of knitting it separately and sewing it on.
I really appreciate this technique tutorial.
Err, could you please repost the image of the chart legend? Some of the text was cut off when you cropped it.
Your tutorial suits perfectly to my Silver Belle theme!
Will blog it in my blog!
I love this! Thank you for the very clear explanation.
This is great-exactly what I wanted to do with my sweater edgings!
Great instructs. I’m stuck on how to join the cable when the bottom cable meets. Any instructs on this?