Since Shibui Silk has been out for 2 months now and nothing makes me happier than eager knitters itching to put those projects on their needles. There have been lots of questions and inquiries about Francis and today I am going with a little step by step tutorial with photos what makes this tee so innovative – construction.

Francis is worked horizontally and in 2 parts. Beginning with the sleeve and working towards the middle of the front, while both backs are worked using short-row shaping, then overlapping. Yet there are no side seams, no shoulder seams. I know for a fact many knitters do not like seaming knits. I truly believe there are times when seams are a must simply for preserving the structure of your knit garment and you have to account for likely fiber behavior in your yarn after washing and wearing. But at times when I see there is a chance of making seams invisible – I am all for it.
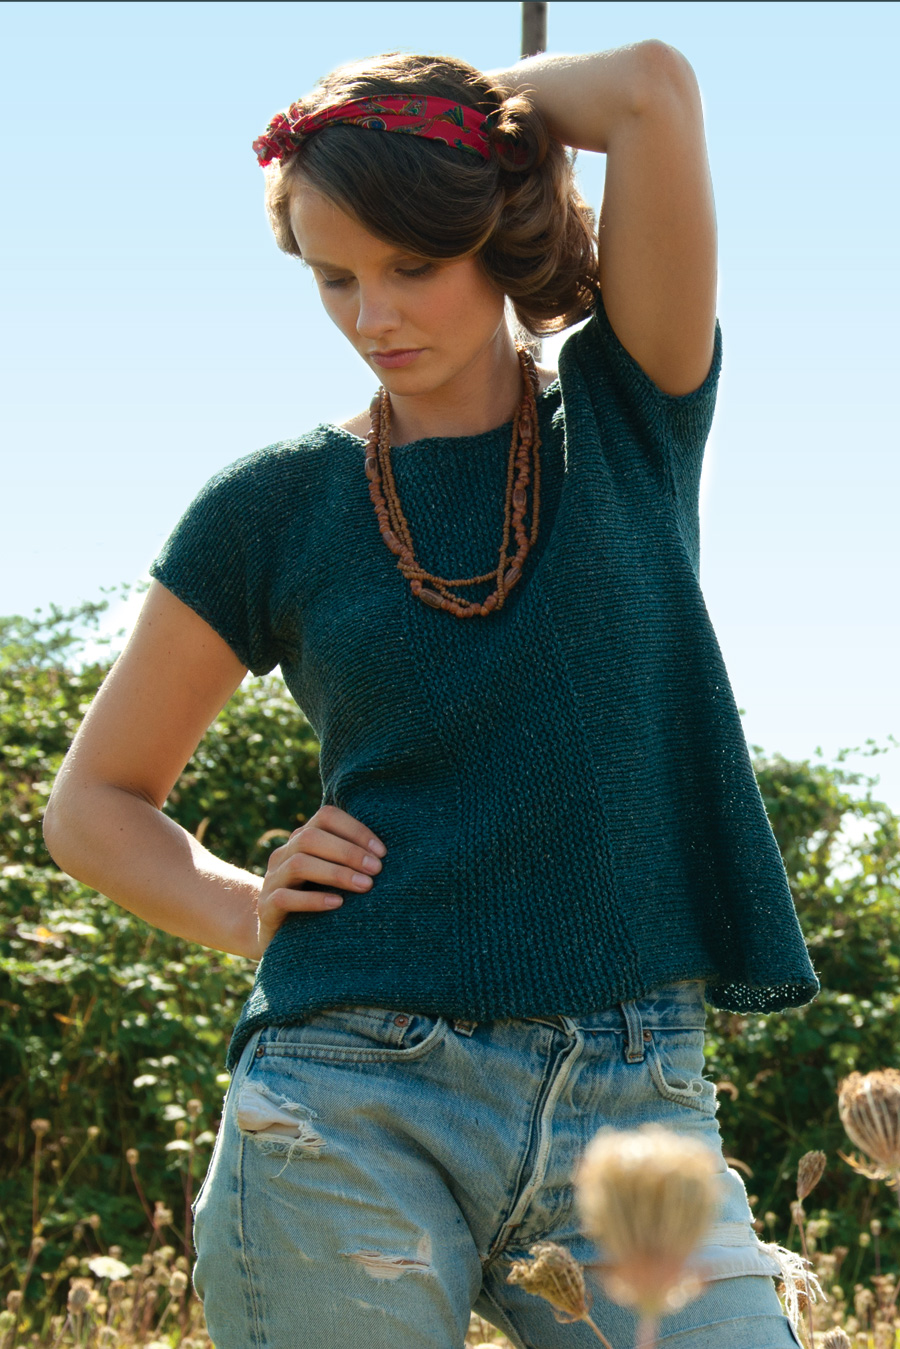
In case of Francis, although body is worked straight along the sides, the opening on the back is very flexible, that helps the Tee to acquire that slightly flared silhouette. And in case if there were side seams, they would naturally be riding up the front and be quite noticeable. Being a detail oriented perfectionist I didn’t want those visible details and Heichi is strong enough yarn to support this tee’s structure, so I have figured out how to make it go away.
1.
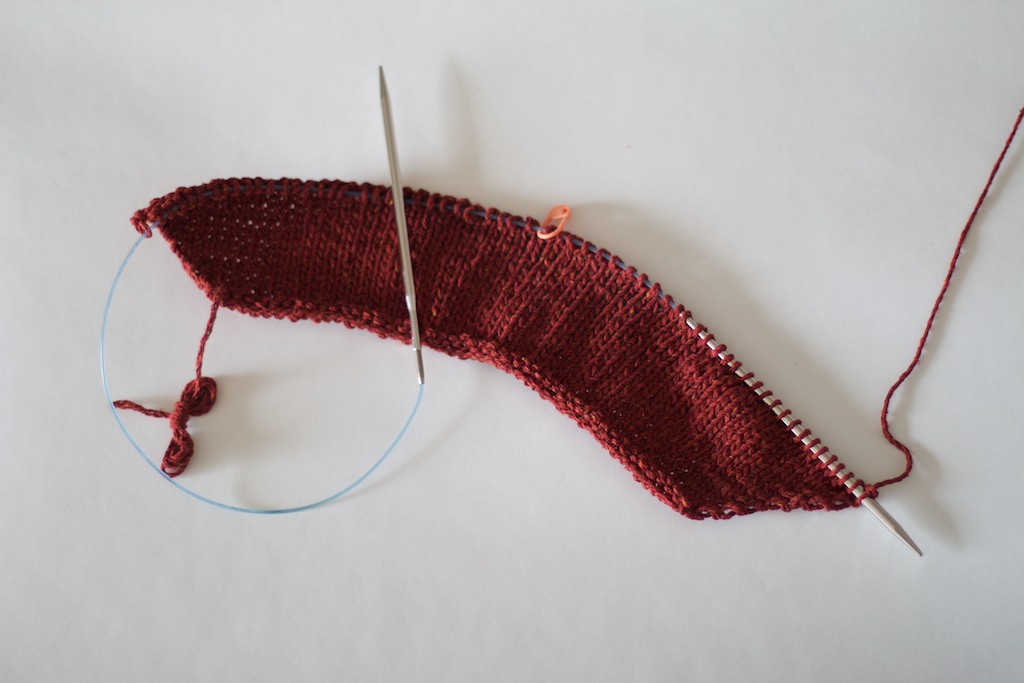
Starting with the sleeve and working your increases all the way till shaping is complete, ending with WS.
2.
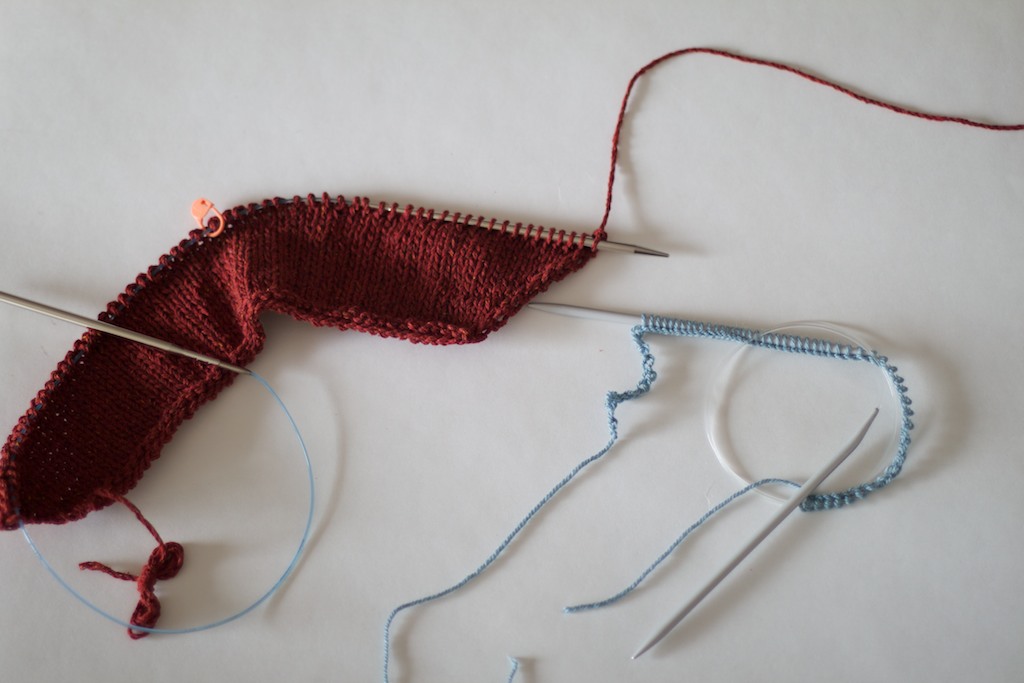
Next step would be casting on stitches with scrap yarn provisionally on a spare needle.
3.
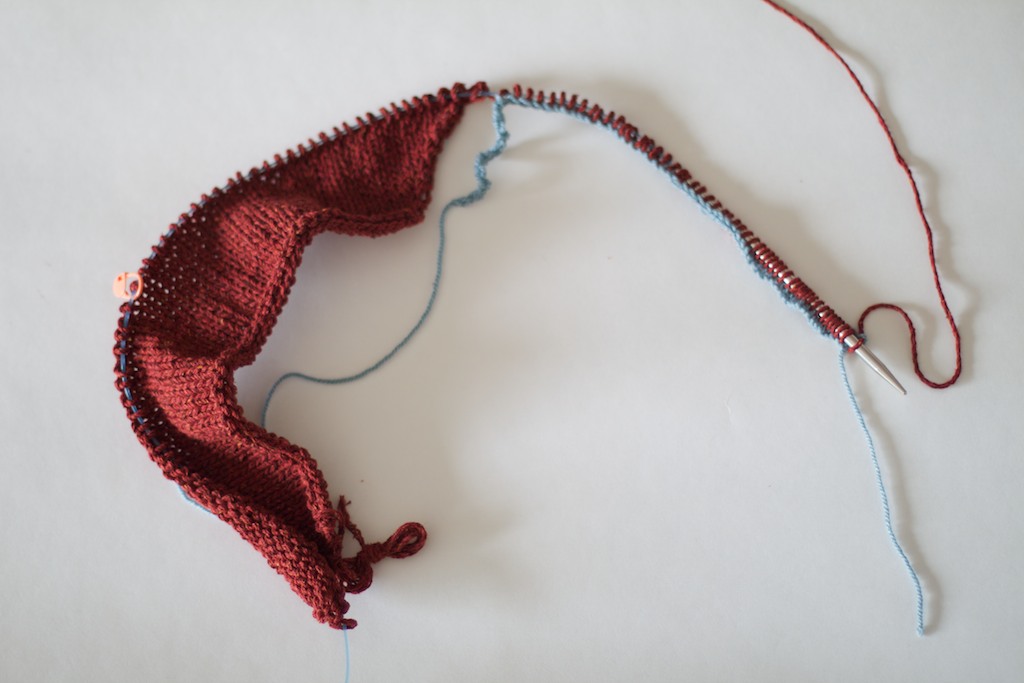
With yarn still attached to your sleeve, purl across freshly cast on stitches.
4.
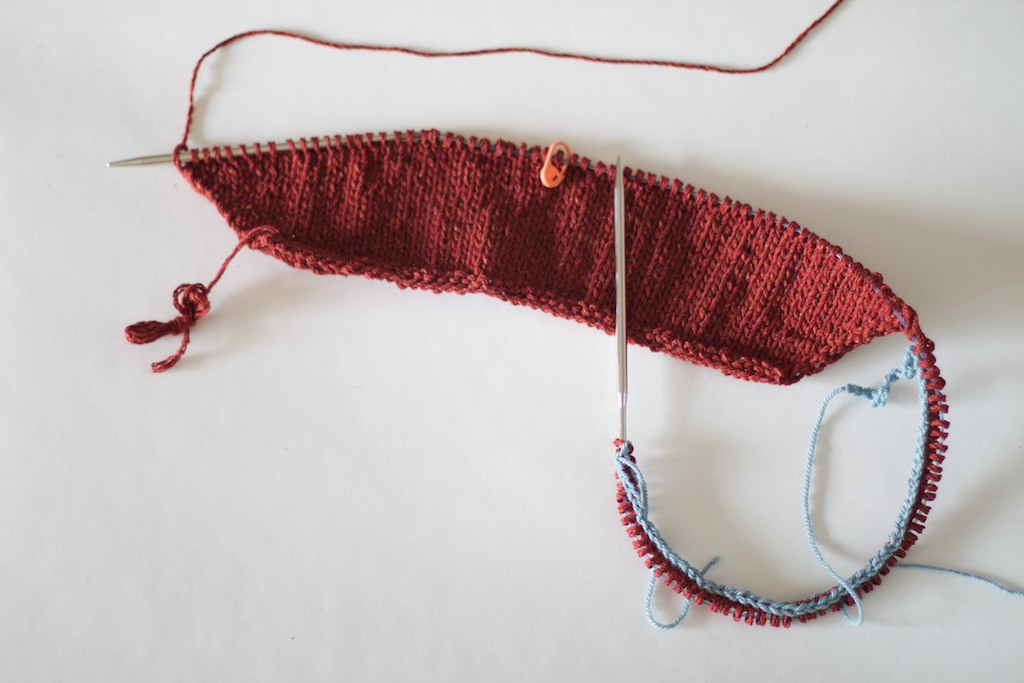
Now working on RS knitting across all of your stitches on the needle to the other end of your sleeve.
5.
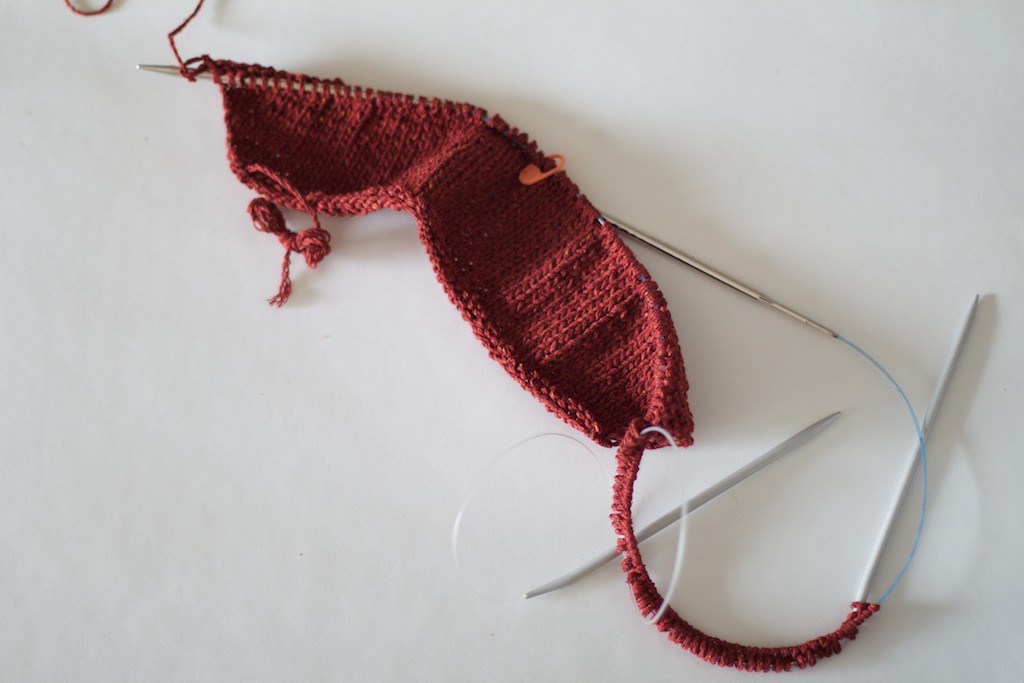
This step is a little bit fussy. But you unravel scrap yarn from provisional cast on and place those stitches on spare needle.
6.
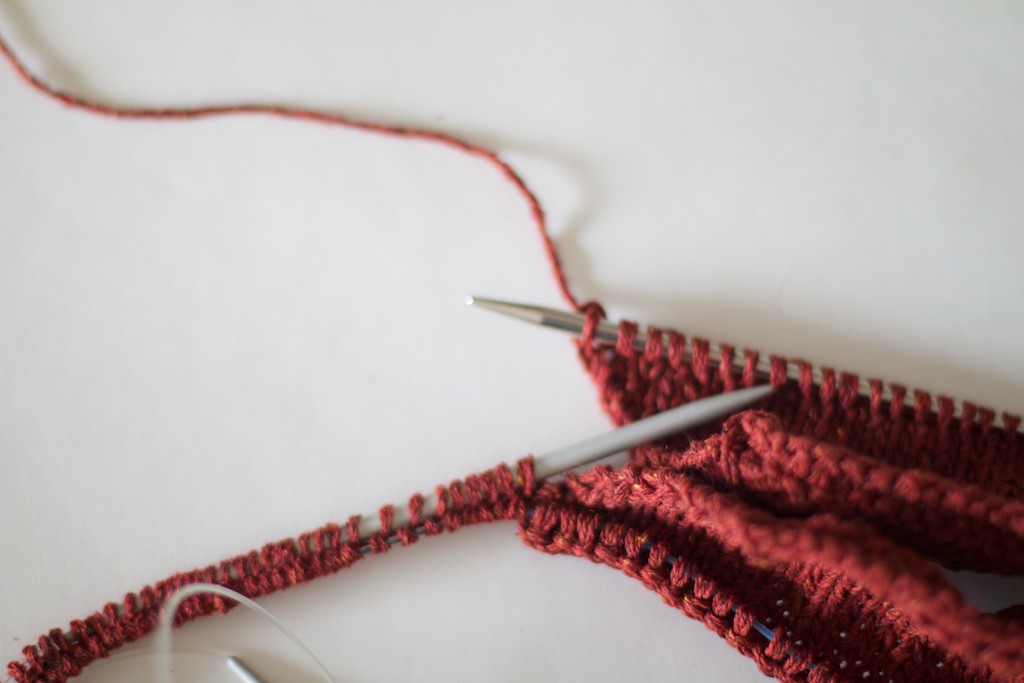
And this is the part that probably caused most confusion. Fold your sleeve slightly in half to bring your work needle to underarm/armpit to meet the beginning of your spare needle. Knit across those stitches on spare needle.
7.
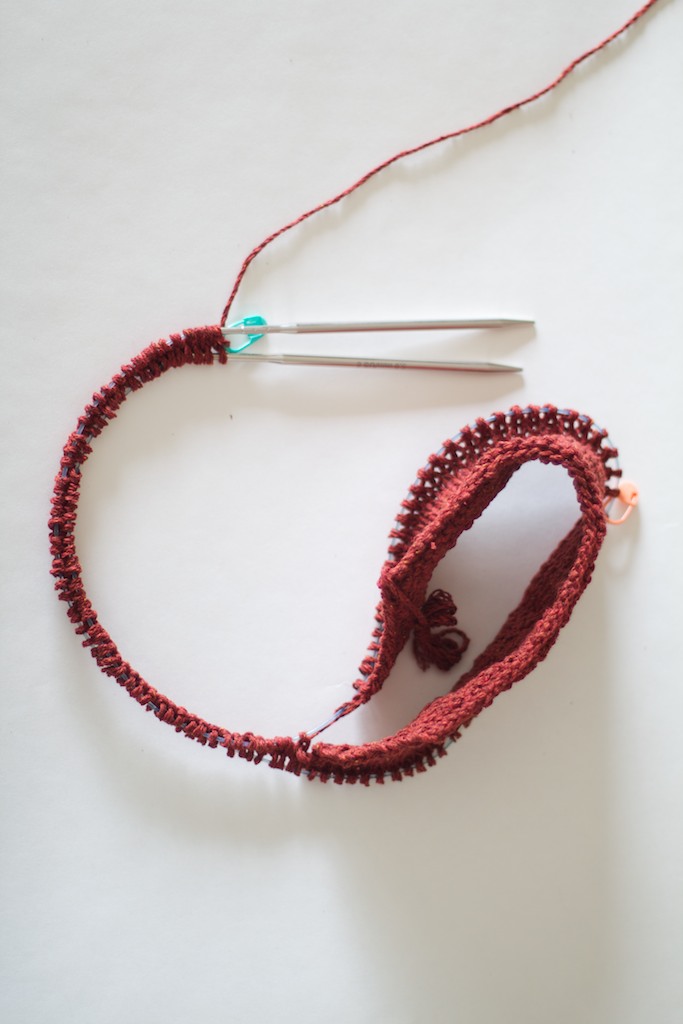
In this step many have found it hard to work just with one long circular needle, so you can split your stitches between working and spare circulars. But what is happening here – you work from front hem up towards the shoulder, across your shoulder/sleeve, down towards the back hem. As one of knitters correctly compared it – you are working a “big upside down U”. And as you progress, you will find more fabric growing and working needle being sufficient in length to accommodate your knitting.
Use your tail to seam the sleeve seam and use excess of it to close up that underarm hole if necessary.
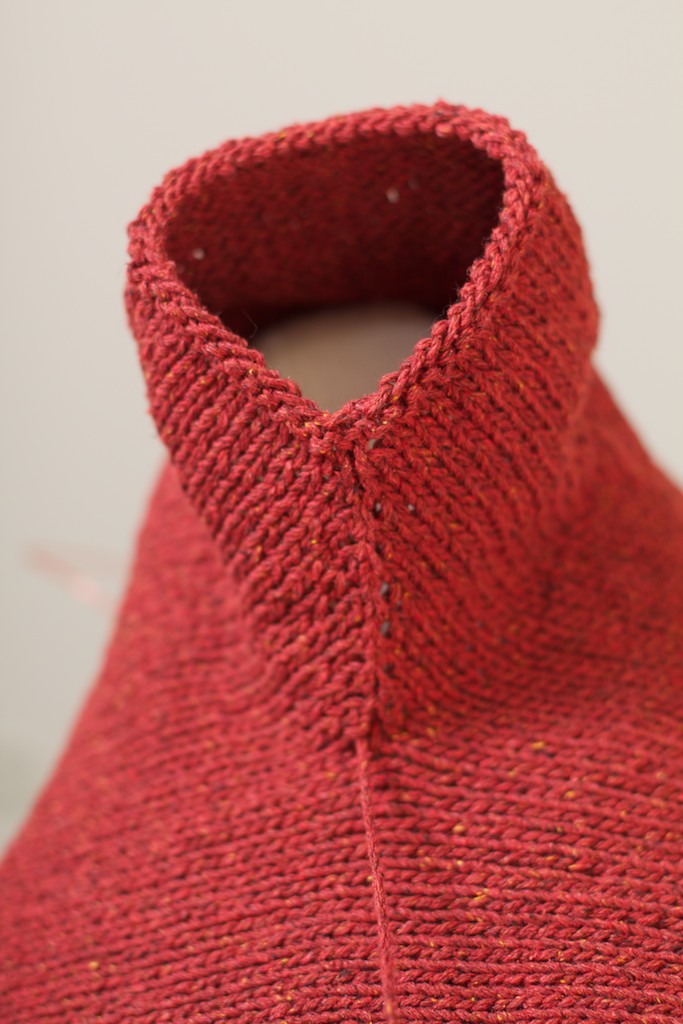
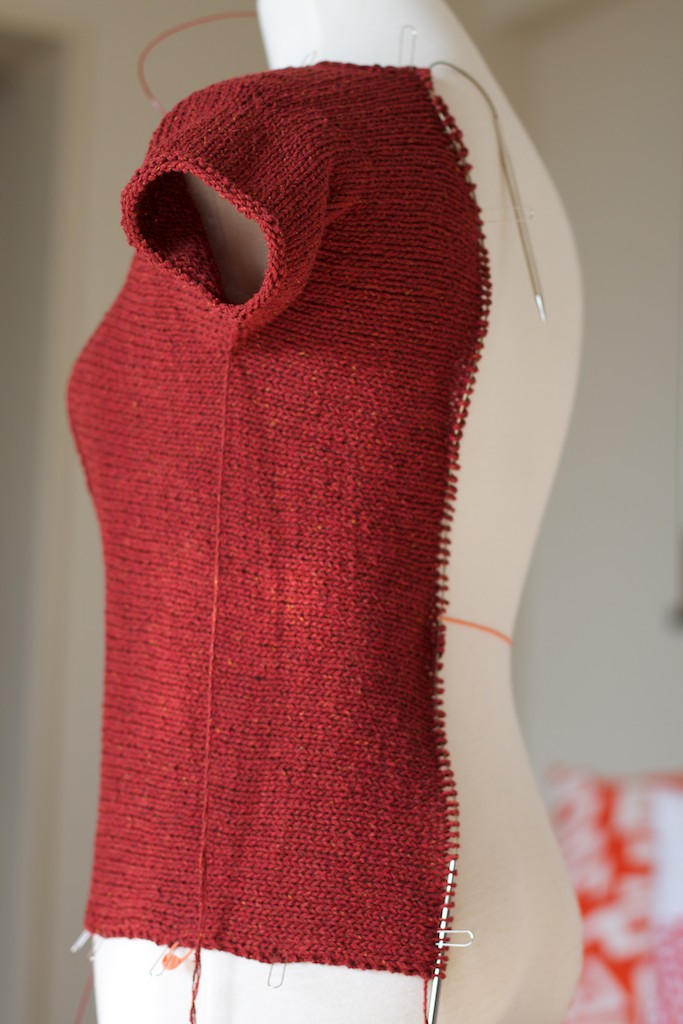
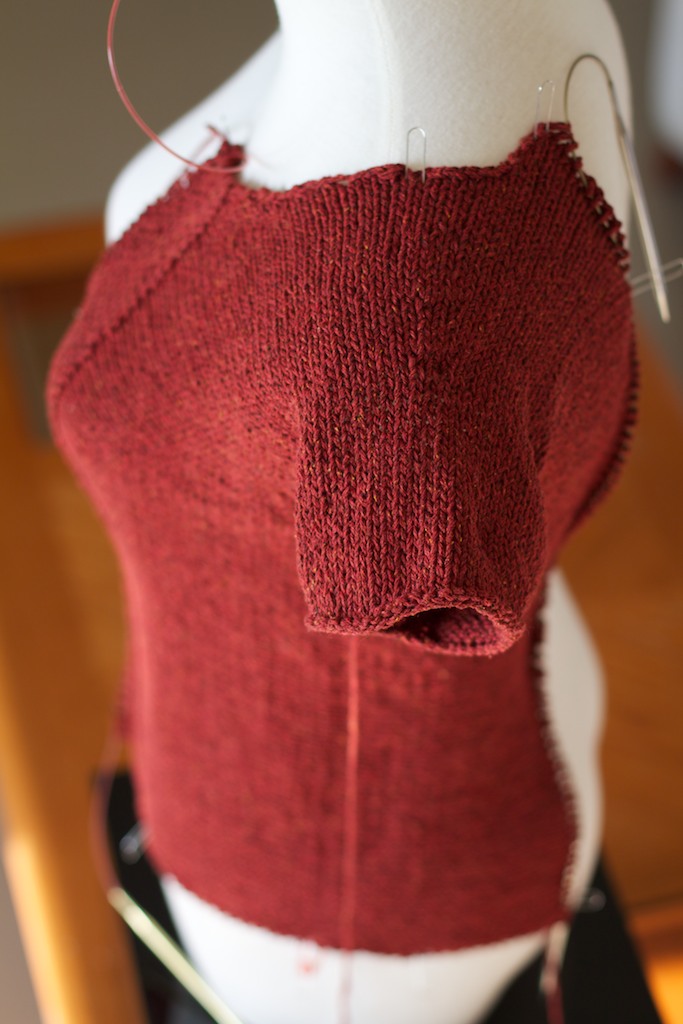
View Francis projects on Ravelry knitters are working on or already completed
Francis in images above is being made in Brick and I can’t wait to finish it. Weather is warming up in Japan so it works as a great season transitional garment, to layer or as is. Heichi comes in array of trendy colors and lots of neutrals as well.
FRANCIS SINGLE PATTERN PDF
8.00

NB!
Couple days ago there has also been some errata discovered and I have updated Ravelry design page for Francis, but I am posting existing errata below as well.
Errata for the printed booklet ONLY:
For Left and Right Back Neck Shaping:
77 (80, 82, 85, 87, 90, 92) sts rem.
Work 31 (33, 37, 41, 43, 45, 49) rows even. Piece should measure approx. 5.25 (5.5, 6.25, 6.75, 7.25, 7.5, 8.25)” from last neck dec.
Bind off for the right back:
Next row (RS): Work to end, picking up and purling wraps tog with wrapped sts as you go. BO all sts kwise on the WS.

I love all the patterns in Shibui Silk and have 3 that I am longing to make. However, my favorite is Francis, what a great design! I am looking forward to starting this one, hopefully soon!
Thank you for the tutorial!
Brilliant design! Thanks for sharing.
You rock….thank you!
Genius! I love your ingenuity in always creating designs that defy traditional bottom-to-top knitting. I’m always in awe of your designs: they are so versatile, have interesting structure, and are created with great understanding of the yarn. Thanks for great inspirations!
Absolutely TRUE. Bravo, Olga!
Thank you very much! <3
i consider myself an experienced knitter and I loved this tutorial. It was really clear. Many thanks. I love the pattern!!!
I love the pattern and and dying to make one but don’t think I have been having expertise to pull it off.don’t understand since the sleeve portion of itafter the provisional knitting is done.
Hey Jazzy Olga! I’m trying to figure out the Francis pattern and am having a really difficult time figuring out how the short rows work to make the curve in the back. The directions do not make sense to me. Could you help me?
Hello,
Sorry you are having hard time understanding the construction for this garment. The short rows or partial knitting are done along the bottom on the back for each side, which turns you to work more rows on top and less and less of them on the bottom. If you are not familiar with the short-rows, I strongly suggest learning about them maybe through a series of Youtube videos or your local yarn store might be offering classes, this design might seem simple at first sight but the make out of it is really more advanced level.
Best wishes,
Olga
Could you tell me where the short rows begin? Do they start after the last dec row for the neck shaping? It reads “at the same time ” when x number of rows have been worked ( my size it would be 32) from side seam begin shaping curved lower edge. I’m not sure what “at the same time” means
Please help
It means that there are several things happening simultaneously, that you need to read through the entire instructions first and then proceed with both of those instructions in mind. I suggest to keep even two row counters and set of notes to keep you on track. Hope this helps! Best of luck!
Hi – I love your pattern and I am wondering if I wanted to do this in 2 colors how much yarn would I need in each color?
Hi Kathy,
You can do anything you like! But how were you going to use those 2 colors in your Francis, stripe it?
A friend asked me to make this sweater for her. I have limited experience with sweaters and was just wondering when increasing by making one. What technique did use to make one. I find knitting front and back the easiest but it isn’t always suited to the project. Thanks.
Hello Carol,
I made either M1 (make one) or kfb (knit into front and back of the same stitch) for increasing. This sweater has novelty construction, so if you are not used to making sweaters or know much about their constructions this sweater might pose a challenge as it’s knit sideways and in 2 pieces that you later graft together. Hope this helps though! Best of luck, Olga
Hello Olga!, like always, great design, great construction and great tutorial It´s have been very helpful for me. Thanks a lot!
All the best from Spain
Hello. Please could you clarify if you have to do two sets of provisional cast on? From tge above tutorial i am womdering how you get to 158 stitches. Thamks
You knit from 1 provisional cast on first, then you take is out and knit from the live loops into opposite direction.
Thank you for this explanation 🙂 Now I can move forward with my Francis!
Francis
I am stuck on the provisional cast on. I only see how to put 51 on but I don’t get to the total of 158.
You pick up the other stitches from the other side of that cast on. You make a big U around the shoulder to come back to that side.